Image Map

Friday, September 13, 2013

Kitchen Backsplash on a Budget


Tools you will need:
  • Tile Saw
  • Margin trowel 
  • Wall trowel
  • Buckets at least 2
  • Towels
  • Pencils or sharpies
  • Tile spacers
  • Sand paper (optional)
  • Rubber Float

To save money, we purchased floor tiles from the clearance section of Lowes.  We got the last remaining 10 pieces of these dark 16x16 tiles for .72 a sf, and a 2 boxes of 12x12 tiles for .60 a sf.  The black marble tile was a splurge at $4.  With thin set, grout, and the cheap tiles, we ended up paying less then $50!

But we payed for it in labor.  To create all of those tiny pieces required hundreds if not thousands of cuts. 

Drawing the Accent Star
Here's a  great tutorial on drawing a 5 pointed nautical star.  For mine, I used a piece of paper starting with a center point (argh for not taking pictures!) and sketched 2 10" perpendicular lines centered at 5", then 2 5" perpendicular lines diagonally centered at 2.5".

You could also size and print an image from Google and use that.  Once I had my paper drawn, I cut out one of the triangles and used that as my template.  After cutting out all of the triangles, I had this:


I attached masking tape where I would cut the black marble because I couldn't see any markings on it otherwise.  To do the cutting, I cut it into 4 pieces first, then trimmed out the star section.  The marble was very brittle because of the veins, so be very careful and slow.  One tiny section broke off but with a little super glue and the star and grout pushing up against it, you wouldn't even know it was there!


Excuse the dirty crockpot in the picture
Here's the final product ready for some thin set!!!


HOORAY!
I measured out where I would need the star to go before taking the stove out.  Use a level to make sure it's perfect.


You can apply tile directly to drywall, but you should rough up the paint with some sand paper to get better cohesion.  Because the star was so heavy, and the marble was so slick, I had to screw some boards up to make certain it stayed put.


Here's a great tiling tutorial.   

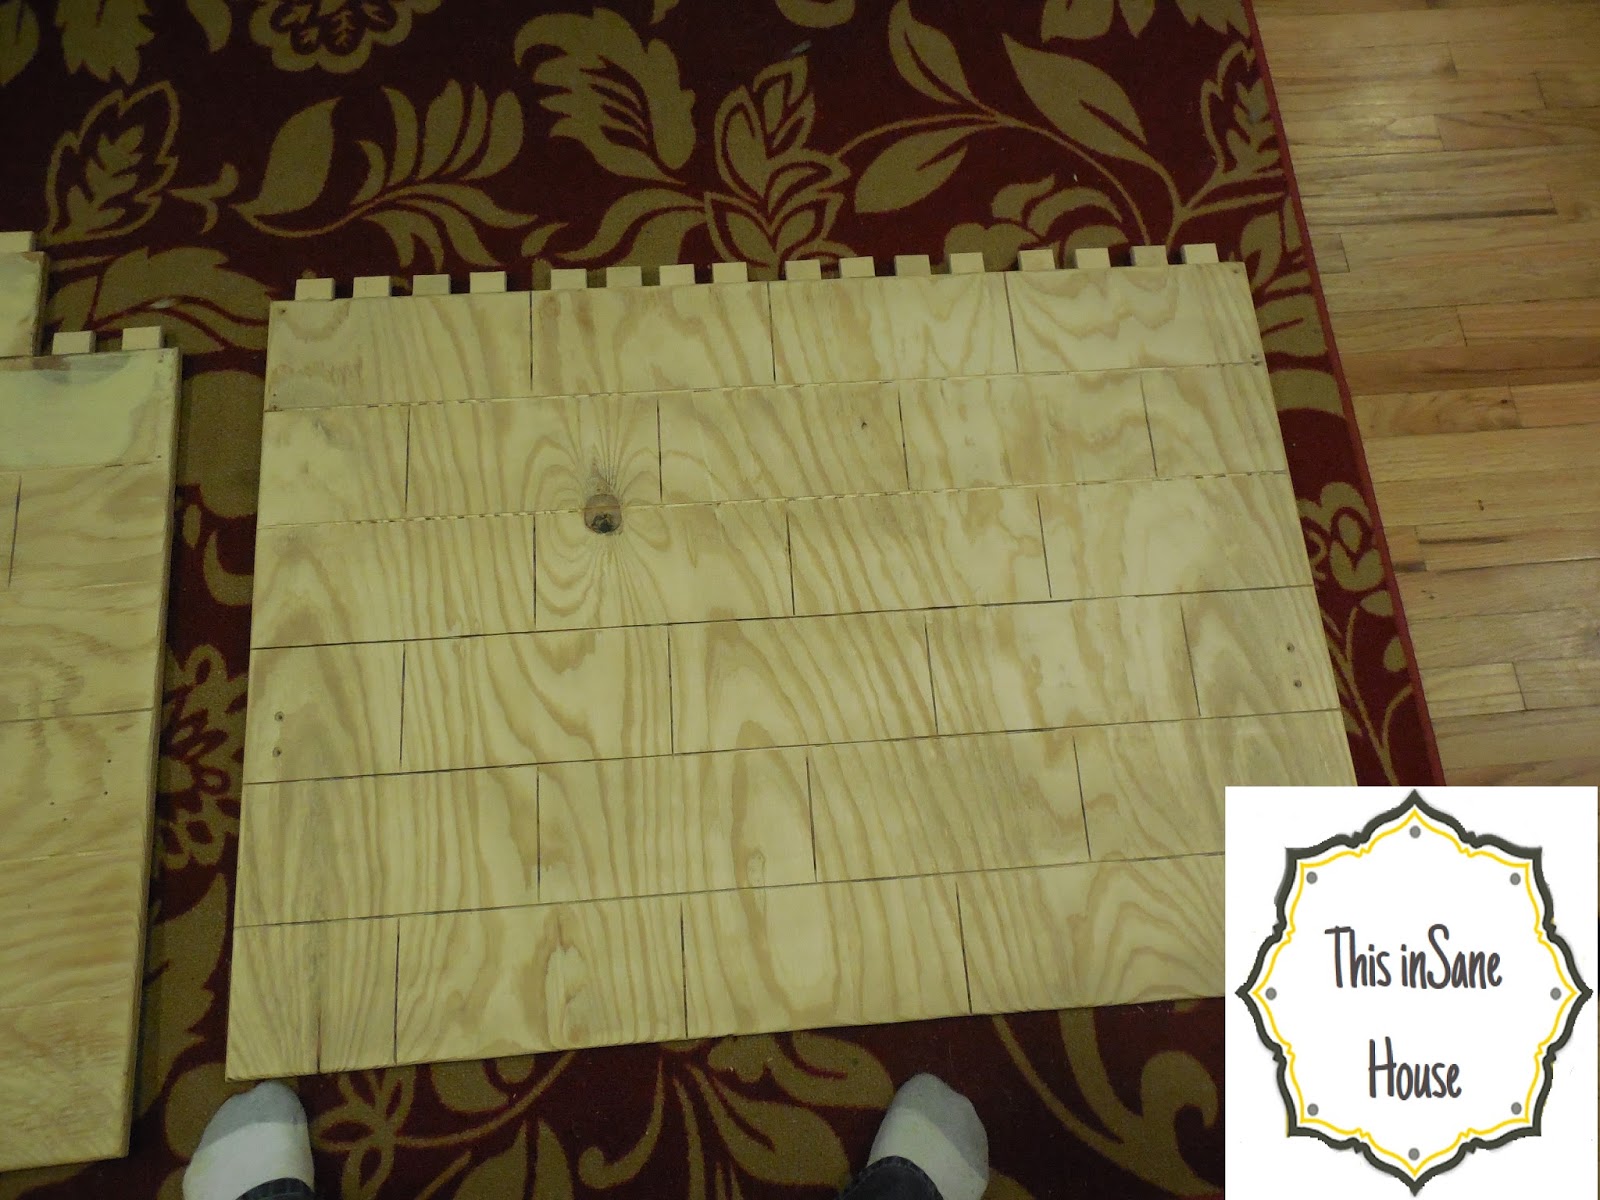
I cut each piece to be 5 7/8" x 1 7/8."  The best way to do this is to make templates, and cut each piece exactly the same way to create cohesion.

Using the 12x12 tile, cut a strip that is 12x1 7/8."  This will be a cutting template to create more strips.  Use this template strip butted up against the edge to cut another strip.  Cut this one in half and it should be about 5 7/8."  This will be your final template.  Mark each template with sharpie, and don't lose them!   

When marking the tiles, make sure they are dry or the marking will bleed.  Find what marking techniques work best for you and the material.  I've used heavy pencil lines on certain materials, and sharpies on others.  If you use sharpie, rub it off right after you put it through the wet saw.  I hate the "tile pencils."   I find they don't give a good enough edge, and peeling the paper/sharpening them is awful.

Here's the 90% completed stove side.


If you look closely at the top of the tiles you'll see numbers.  I would number tiles and spaces that needed distinct cuts, so I could take out several without confusing what goes where.

I was working 2 jobs at the time so I only had a few hours a day to work on this project.  It took a long time!


Here I'm applying thinset to a trowel, and then putting it on the wall.  I found this to be too messy and imprecise because of the minimal working room.  It also didn't give you enough time to get everything perfect.  Eventually, I would just apply thinset to each individual which seemed to be easier.


Use spacers in every direction and make sure your lines are straight.  Check them with a straight edge of some kind often.  Also, consider how you want your outlets and edges to look.  If you want them inset, draw a box around where your outlet covers are and leave 1/8" space.  Also consider if you want a grout line in the corner or if you want the tile butted up against the wall. 

Since this project I've used the harder plastic spacers which have a lot less give to them, making it easier to hold straight lines and not have to keep going back to fix slippage.


Here's the finished view from the right side, without grout.


Here's the view over the sink.  There were a ton of tiny slivers below the windowsill.  Those were the hardest pieces to cut out of the whole project because they had a tendency to break, especially tiny L's.


Here's the left side without grout, breathtaking!


Abby sure loves it!


And here's the final with grout! 

 
If you have created a custom back splash, floor, or shower, I want to see it!  Comment below and share.

If you enjoyed this post, check out some of our other diy projects:

And don't forget to follow us for other great content!

Wednesday, September 11, 2013

Please Excuse the Mess

We are in shambles.

Just in case you're wondering, we are in the midst of a blog overhaul. Please be patient as we update links, photos, and pages.

We are aiming to make navigating around here and updating the content an easier process for us and a more enjoyable viewing experience for you all.

Within the next few days we should have everything working pretty. That is if the ear infection the kids keep passing back and forth doesn't take one of us adults down too.

Thanks for understanding, and as always we are so grateful you stopped by!


Friday, August 23, 2013

Kale Turkey Meatloaf

My house is not big on meatloaf. In fact, whenever I would get a really bad craving for meatloaf, and dish some up for dinner, there was always a lot of eye rolling. To which I always replied "This is what I cooked. Eat it, or don't, but my tummy is happy". 

Recently, this has changed. My meatloaf is met with happy smiles, empty plates, and (gasp!) requests for seconds from the kids. How can this be?!? Is it magic??

The answer may surprise you. Turkey - kale - and milk. That's right my friends. Healthy and wholesome ingredients have transformed my family into meatloaf eaters. Who knew?

Turkey Kale Meatloaf (adapted from Real Simple)
1.25 lbs. ground turkey
1/2 white onion, diced fine
2 c. spinach, chopped
3 c. kale, chopped
1/2 c. panko breadcrumbs (if using Italian panko, omit Italian seasoning)
2T mustard
2T Italian seasoning
1 egg white
salt and pepper, to taste
1 c. milk (I use 1%)
1/4 c. ketchup


Preheat oven to 400 degrees

Begin by washing your kale and spinach. If you don't have a salad spinner, I highly recommend getting one. It makes cleaning your leafy veggies so much easier, and saves me tons of paper towels.


Once washed, finely chop your spinach and kale. One meatloaf uses approximately one small bag of spinach, or one destemmed bunch, and two large leafs of kale, stem removed.


Place your chopped greens, bread crumbs, Italian seasoning (if using unseasoned bread crumbs), mustard, egg white, salt, pepper, and milk in bowl. 

Chop the onion and add to the mix.


Add your ground turkey. I used 93/7, but you could easily use extra lean 96/4 if you like. Then get your hands in there and get dirty!


Mix until just combined. Try not to over mix, or the turkey will lose its texture and just be a mush.


Form your mix into loafs in a 9 x 13 pan. If you have tin foil, you can line your pan for easy clean up. Or, if you forgot to buy tinfoil, like me, you can spray your pan with pam to make easier clean up. Spread ketchup over the top.


Bake for 45-50 minutes, or until thermometer reads 165 degrees.


Our favorite way to enjoy is with roasted garlic gold potatoes and salad.


Yum!! The milk adds moisture, while using panko bread crumbs keeps the meatloaf from being one texture. 

Are your families meatloaf fans? What is your go-to comfort food?

Thursday, August 22, 2013

LEGO Bed Frame

For my nephew's birthday, I decided to build him a LEGO bed frame!  Before the bed frame, he had been sleeping with the mattress on the floor.  Now he sleeps in style!


I built the frame for a twin sized mattress, but it could easily be modified for any size mattress.   

Materials:
  • 2 - 3/4" 4x8 sheets of mdf  ($35x2=$70) *I used scraps and panel glued them together out of cheap plywood.  The problem with using cheap plywood is that it has several voids that need putty, and it needs a TON of sanding.  Hours.
  • 5 - 2x4's-can even be studs ($2.77x5=$13.85) *I had most of these from a previous project
  • 4 - 90 degree brackets (1.50x4=$6)
  • 16 - 2 1/2" wood screws ($6.50 for a box) *I had these from a previous project
  • 3 - Quarts of primary color paints ($6x3=$18) *We had 2 of these
  • Brad Nails
  • Wood Glue ($3) *Had this
Total cost to buy everything: $117.35 plus tax.  
Total cost we paid: less then $30.

Tools:
  • Circular Saw
  • Drill
  • Router *not necessary, but greatly increases the appeal of lego "tops"
  • Table saw would be ideal, but a jigsaw could be used to cut the "tops"
  • Paint brush
  • Brad nail gun *not necessary but makes it much easier
  • Bar Clamps *or ingenuity
  • A Straight Edge
  • Patience
The Plans


Start by cutting the pieces:
  • Footboard: 30x41" 
  • Headboard: 45x41" (Or another 30"x41", then each 5" tier above it and panel glue them together)
  • Support Rails: 2 - 8 1/2"x76" 
  • Support Rails: 2 - 2x4 cut at 76"
  • Fall Bar: 4 - 1"x76"
  • Fall Bar Connections: 28 - 2"x3"
  • LEGO Tops: 32 - 1.5"x3/4" 
  • Mattress supports: 6 2x4x
Use a straight edge to cut all the large or long pieces with a circular saw.  Here's a good tutorial if you need to make one.  I suggest cutting out a long strip, 1.5x40", for the LEGO top pieces. For the fall bar connections cut 3x62".  Then cut the individual pieces on a miter saw, jigsaw, or table saw.

To make the lines for the LEGO's, use your straight edge at every 5" across and set your depth on your circular saw for about 1/8". For the vertical lines, start from the center top row, and with your straight edge cut a line. Continue this on every row, moving the line over 5" each time (see diagram for better understanding) and every 5" place a cut.  The ends will be a 1/2" longer or so then the rest, but it's not noticeable.


If you don't feel comfortable doing this with circular saw, use a router with a straight edge.  Go very slow and steady.
Once you have your pieces, glue and clamp together the two pieces for the support rails.  If you don't have clamps, either put weights throughout, or brad nail/screw them together.  If you screw/nail them be sure to sink the screws below the plywood and cover the holes with wood putty.

For the fall bar, space the connectors evenly.  It should be around 3 5/8" space if you keep a connector at each end.  Put them together with the 1" up so it gives dimension.


Once I had all these pieces cut and assembled, I decided to do a test assembly.  I lined the fall bar with the top corners, and the support rails beginning with the third row. Looked good!


Route the LEGO tops with a round over.  Round them on 3 sides leaving 1 of the 1.5" sides flat.  Do this on both sides.   While you have your router out, route the edges of the head board and foot board, leaving the bottom.  Make sure on the foot board that you round over both sides.

Space the LEGO tops evenly and nail those suckers in!  You're almost there!


Putty and sand if you're using plywood.  This took the longest amount of time for me.  I painted carefully with a brush.  The red took 4 coats.  4 COATS!!!  YUCK.  Get a very tiny brush, like a water color brush, for the crevices.  You could tape everything off if you desired.

Assemble with the angle brackets and screws, put in the 2x4 supports across  and pat yourself on the back!


Unfortunately, during transit some of the paint was still tacky and there were a few spots where the pieces clung together.  If you have to move it, do so with wax paper.  But other then that my nephew was a very happy boy!

If you build a bed based off this post, or something like it, I want to see it!  My original plans had drawers underneath but I simply ran out of time.  She picked up some tubs for storage that fit under perfectly.  I would love to see LEGO bunk beds.  Lets get the creative juices flowing!

Tuesday, August 20, 2013

Construction Site 3rd Birthday

Gabriel turned 3! Granted it was in January, but who is keeping track?

Gabe has an obsession with construction trucks, power tools, basically anything that reminds him of his dad; the resident handyman. When it came time to plan his birthday party the theme was a no brainer: Construction Site Birthday Party!


It began with the hubbs building a saw horse for me. I said it would serve a dual purpose; useful for him and fun for the party. I spray painted it yellow, then marked off the top and applied the black spray paint. The sign was homemade on leftover cardboard. My sad little balloons didn't fair very well. It was high 80's that day, and the balloons began to sag almost immediatly.

Black and yellow streamers helped announce the party was here

To jazz up the backyard I ordered these construction signs off Amazon. Gabe loved having us read the different signs to him. We also used yellow and black streamers to create caution tape on the jungle gym and deck. It helped spread the constuction site feel all over the yard.


For food we wanted simple, easy to grab, playful, and scrumptious.


The "dig in" sign I made by cutting a piece of cardboard and spray painting it black. Then I taped off the black border and did two coats of yellow spray paint. Finally I used a black sharpie to write the words and draw the excavator. Free, fun and easy. My kind of project.


Cheese puff "pebbles". I looked everywhere for these stinkin cheese balls!! Finally found them at Target.


Fruit skewer "nuts and bolts" We have fruit skewers or cups at every party. It is always a hit, and our friends with dietary concerns love them. Also chocolate donut "truck tires". You know, to balance out all the healthy fruit.


Mini baked corn dog "Boulders". I made corn bread, poured it into muffin tins, and put a piece of turkey hot dog inside. They were a huge hit! Tip: when making corn bread use buttermilk. It makes it so moist and flavorful.

Chocolate dipped pretzel "drill bits". When I dipped them in chocolate, I twisted them as I pulled them out creating grooves in the chocolate that looked like drill bits.


Orange Gatorade  "Gear Juice" I used an orange sharpie on the lid so only the G was visible. Created the tags for the bottles using word and a free dump truck clip art.


Rice krispies cookies with chocolate and cookie crumbs. I cut out the krispies with construction cookie cutters (dump truck, drill, hammer, saw), coated them in white chocolate, and put them out for the kids to decorate. Ok, maybe more than a few adults enjoyed them too.

Now for the real labor of love: the construction site birthday cake. I saw a similar cake on Pinterest, and decided to make my own version of it.


Yellow and dark chocolate cake, and milk chocolate frosting. For the top I dug out a small hallow in the cake prior to frosting, then filled the void with crushed oreos and chocolate rock candy.

 
 Gabe loved blowing out the caution cone candles.


The best (or most friggin frustrating) thing about the cake was the inside.


 I used this technique to create the caution tape effect in the cake. Be warned. This was a pain in the but. I made two tester cakes before his birthday, and this was still tricky for me. But worth it. Because I am crazy and a glutton for punishment.

Gabe was blessed with so many wonderful gifts. Things he truly adored.


See that box in the background? I wrapped all of his gifts in craft paper then used a black sharpie to draw different construction trucks on each one. He thought it was the bees knees and named each of them before he shredded into his presents.

Side note: notice my poor husband bent over and looking miserable? He felt like crud this day. Went to the dr's the next morning and found out he had the flu!

Had to call all of our party guests "Hey, thanks for coming to Gabe's birthday! Hope you had fun! By the way, we may have infected your whole family with the flu."

Luckily after meds and a few days rest he was feeling much better.


Sadly, this is the best photo I got of his birthday shirt. I ordered the bulldozer graphic on Etsy, then used a printed transfer to make a shirt for him. He asks to wear it all the time.


Gabe's favorite present of the day!! We found this incredible all wood tool bench and tool set at Kohls at Christmas time. The price was unbelievable, and there was no way we could have made one this awesome for that price. So we pounced and stashed it away for his birthday.

Gabe and his sister play with it every day. Which, depending on how you feel about kids hammering on a toolbench is either a good or a bad thing.

 
His new Lightning McQueen scooter. Abigail was a sweetheart and offered to help me build it. Such a helper, my daughter.


I'll be honest, he still has trouble with this one. Because there are two wheels in the front rather than one, it is really hard to keep balanced. We're working on it though.


Other than Trent being sick, it was a great day. There were great friends, good food, and most importantly the birthday boy loved it.