

For my nephew's birthday, I decided to build him a LEGO bed frame! Before the bed frame, he had been sleeping with the mattress on the floor. Now he sleeps in style!

I built the frame for a twin sized mattress, but it could easily be modified for any size mattress.
Materials:
- 2 - 3/4" 4x8 sheets of mdf ($35x2=$70) *I used scraps and panel glued them together out of cheap plywood. The problem with using cheap plywood is that it has several voids that need putty, and it needs a TON of sanding. Hours.
- 5 - 2x4's-can even be studs ($2.77x5=$13.85) *I had most of these from a previous project
- 4 - 90 degree brackets (1.50x4=$6)
- 16 - 2 1/2" wood screws ($6.50 for a box) *I had these from a previous project
- 3 - Quarts of primary color paints ($6x3=$18) *We had 2 of these
- Brad Nails
- Wood Glue ($3) *Had this
Total cost to buy everything: $117.35 plus tax.
Total cost we paid: less then $30.
Tools:
- Circular Saw
- Drill
- Router *not necessary, but greatly increases the appeal of lego "tops"
- Table saw would be ideal, but a jigsaw could be used to cut the "tops"
- Paint brush
- Brad nail gun *not necessary but makes it much easier
- Bar Clamps *or ingenuity
- A Straight Edge
- Patience
The Plans
 |
Start by cutting the pieces:
- Footboard: 30x41"
- Headboard: 45x41" (Or another 30"x41", then each 5" tier above it and panel glue them together)
- Support Rails: 2 - 8 1/2"x76"
- Support Rails: 2 - 2x4 cut at 76"
- Fall Bar: 4 - 1"x76"
- Fall Bar Connections: 28 - 2"x3"
- LEGO Tops: 32 - 1.5"x3/4"
- Mattress supports: 6 2x4x
Use a straight edge to cut all the large or long pieces with a circular saw. Here's a good tutorial if you need to make one. I suggest cutting out a long strip, 1.5x40", for the LEGO top pieces. For the fall bar connections cut 3x62". Then cut the individual pieces on a miter saw, jigsaw, or table saw.
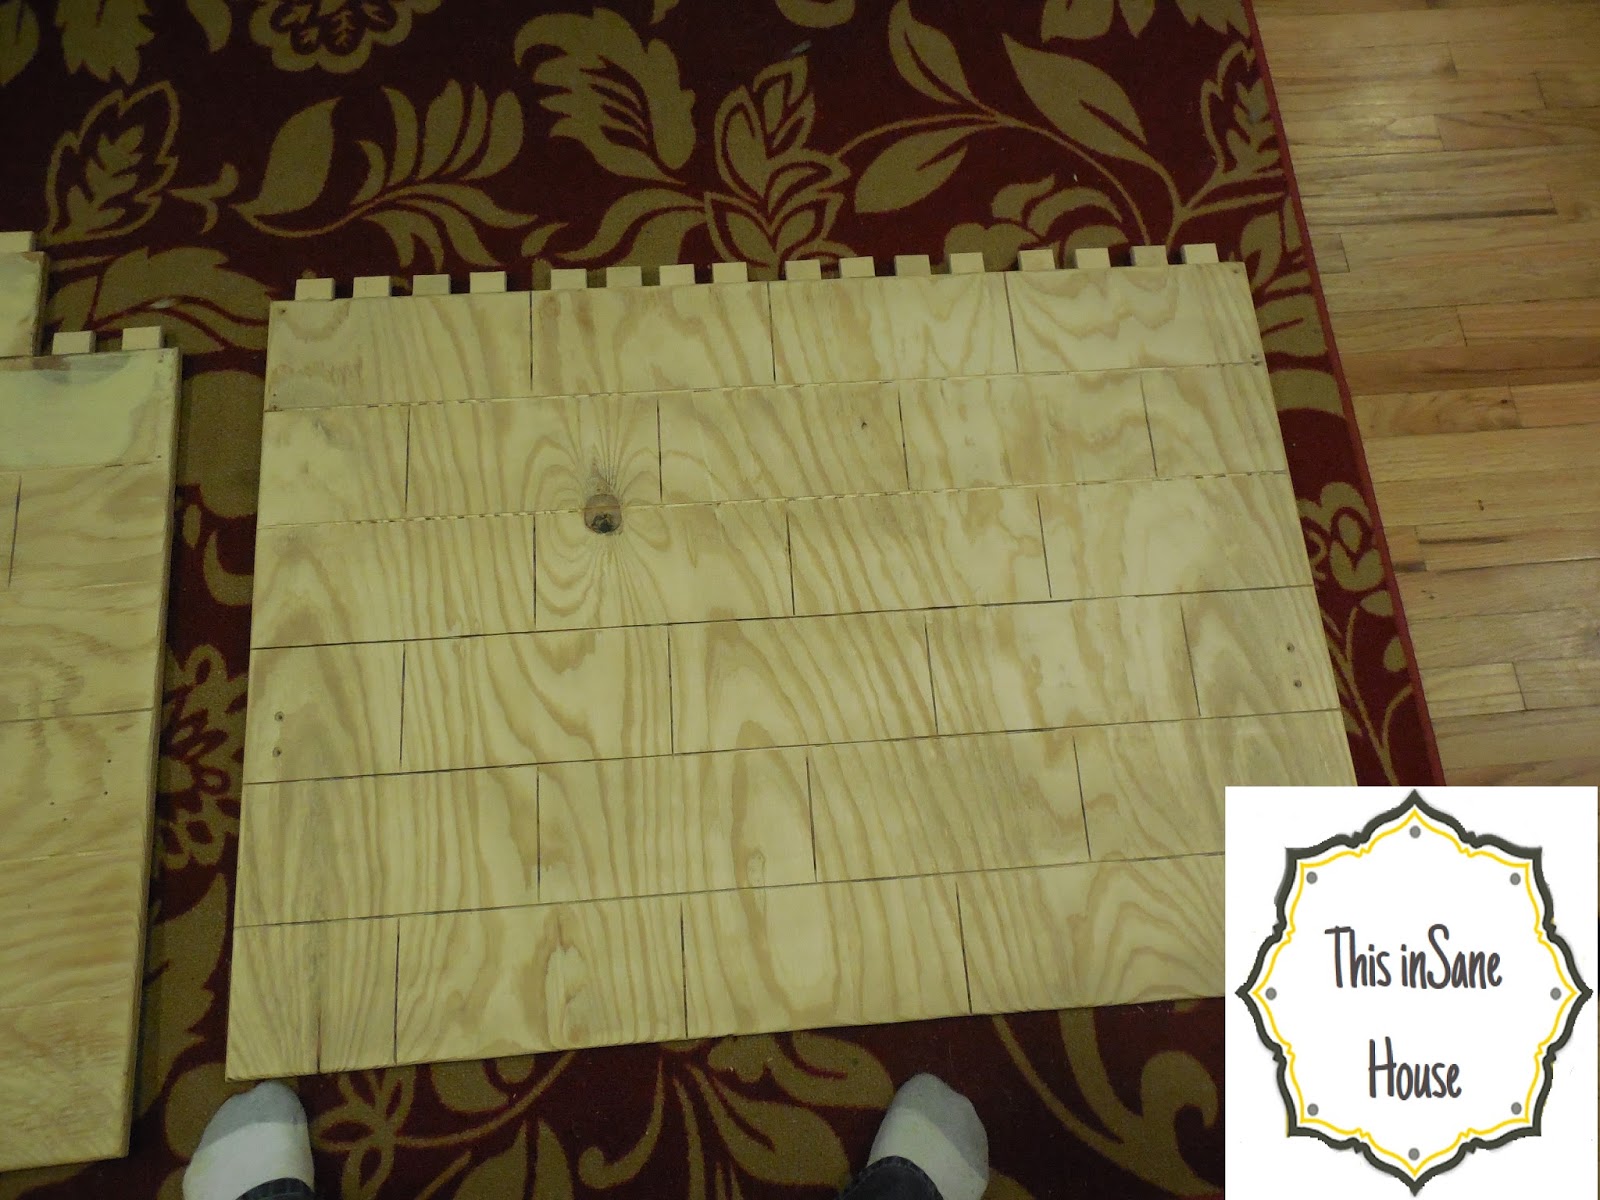
To make the lines for the LEGO's, use your straight edge at every 5" across and set your depth on your circular saw for about 1/8". For the vertical lines, start from the center top row, and with your straight edge cut a line. Continue this on every row, moving the line over 5" each time (see diagram for better understanding) and every 5" place a cut. The ends will be a 1/2" longer or so then the rest, but it's not noticeable.


If you don't feel comfortable doing this with circular saw, use a router with a straight edge. Go very slow and steady.
Once you have your pieces, glue and clamp together the two pieces for the support rails. If you don't have clamps, either put weights throughout, or brad nail/screw them together. If you screw/nail them be sure to sink the screws below the plywood and cover the holes with wood putty.
For the fall bar, space the connectors evenly. It should be around 3 5/8" space if you keep a connector at each end. Put them together with the 1" up so it gives dimension.
For the fall bar, space the connectors evenly. It should be around 3 5/8" space if you keep a connector at each end. Put them together with the 1" up so it gives dimension.

Once I had all these pieces cut and assembled, I decided to do a test assembly. I lined the fall bar with the top corners, and the support rails beginning with the third row. Looked good!
Route the LEGO tops with a round over. Round them on 3 sides leaving 1 of the 1.5" sides flat. Do this on both sides. While you have your router out, route the edges of the head board and foot board, leaving the bottom. Make sure on the foot board that you round over both sides.
Space the LEGO tops evenly and nail those suckers in! You're almost there!

Putty and sand if you're using plywood. This took the longest amount of time for me. I painted carefully with a brush. The red took 4 coats. 4 COATS!!! YUCK. Get a very tiny brush, like a water color brush, for the crevices. You could tape everything off if you desired.
Assemble with the angle brackets and screws, put in the 2x4 supports across and pat yourself on the back!

Unfortunately, during transit some of the paint was still tacky and there were a few spots where the pieces clung together. If you have to move it, do so with wax paper. But other then that my nephew was a very happy boy!
If you build a bed based off this post, or something like it, I want to see it! My original plans had drawers underneath but I simply ran out of time. She picked up some tubs for storage that fit under perfectly. I would love to see LEGO bunk beds. Lets get the creative juices flowing!
No comments:
Post a Comment