

 |
| Solar cover reel completed |
Shopping list:
Solar cover
10 foot 3/4 inch metal pipe with threaded ends (this was for our 9' wide pool)
3/4" female 90 degree fitting
4" long 3/4" nipple
2: 4x4x8 treated lumber posts
6: 3" long 1/4" Eyelet bolts
2 Bags of 60# concrete
Grommets
Large zip ties
Gravel (optional)
Paint or sealant
Tools you'll need:
Grommet kit
Hammer
Wrench
Tape measure
Shovel
Level
Drill
1 and 1/4" spade bit
1/8" and 5/16" drill bits
Miter saw (preference) or circular saw or hand saw
Wheelbarrow (optional)
Getting Started: Set the posts
Start by digging 2 holes at least a foot beyond and 6" to the left and right of the metal supports of the pool. Use the pipe as a measurement to make sure it will fit between the posts you will place in the holes. Make the hole's diameter 1 foot and depth 18 inches.

Depending on the height of your pool you might want to cut the posts. Ours is 52" tall, and I only wanted it to be a foot above it, so I cut the posts down to 82".
52(pool height)+18(hole depth)+12(height above pool)=82"

To help keep the posts level, put a few inches worth of gravel in as you check the level on the post. Remember to keep the posts symmetrical as much as possible. Use a post level to ensure your post is perfectly upright prior to the next step.

Mix a bag of concrete in a wheelbarrow. Slowly add water and stir with a shovel or hoe (my preference) until it has the consistency of creamy peanut butter. Take your time with this, you don't want it too wet.

Fill the hole with concrete making sure to check the level often, then cover rest of the hole with gravel if there's any room left. Repeat for the other pole.

Putting the eyelet bolts in the pipe:
Space the eyelets evenly through the pipe, one on each side nearest the posts, then about every 18"-2'. Drill a tiny starter hole with an 1/8" bit, then drill through it with a 5/16".


Push the eyelet bolts through the hole and attach the nut, tighten with a wrench.

Drilling holes through the posts:
I put the pipe on top of the posts to give me a good idea where I needed to drill the holes and at what angle, because my posts weren't 100% facing each other. I drilled about 4" from the top of the posts using a 1 and 1/4" spade bit.

Once drilled, I sprayed the holes and pipe with WD40 then pushed the post through on one side (I had to remove one eyelet bolt for this step), then back through the other side. Attach the 90 degree fitting and nipple with a wrench.
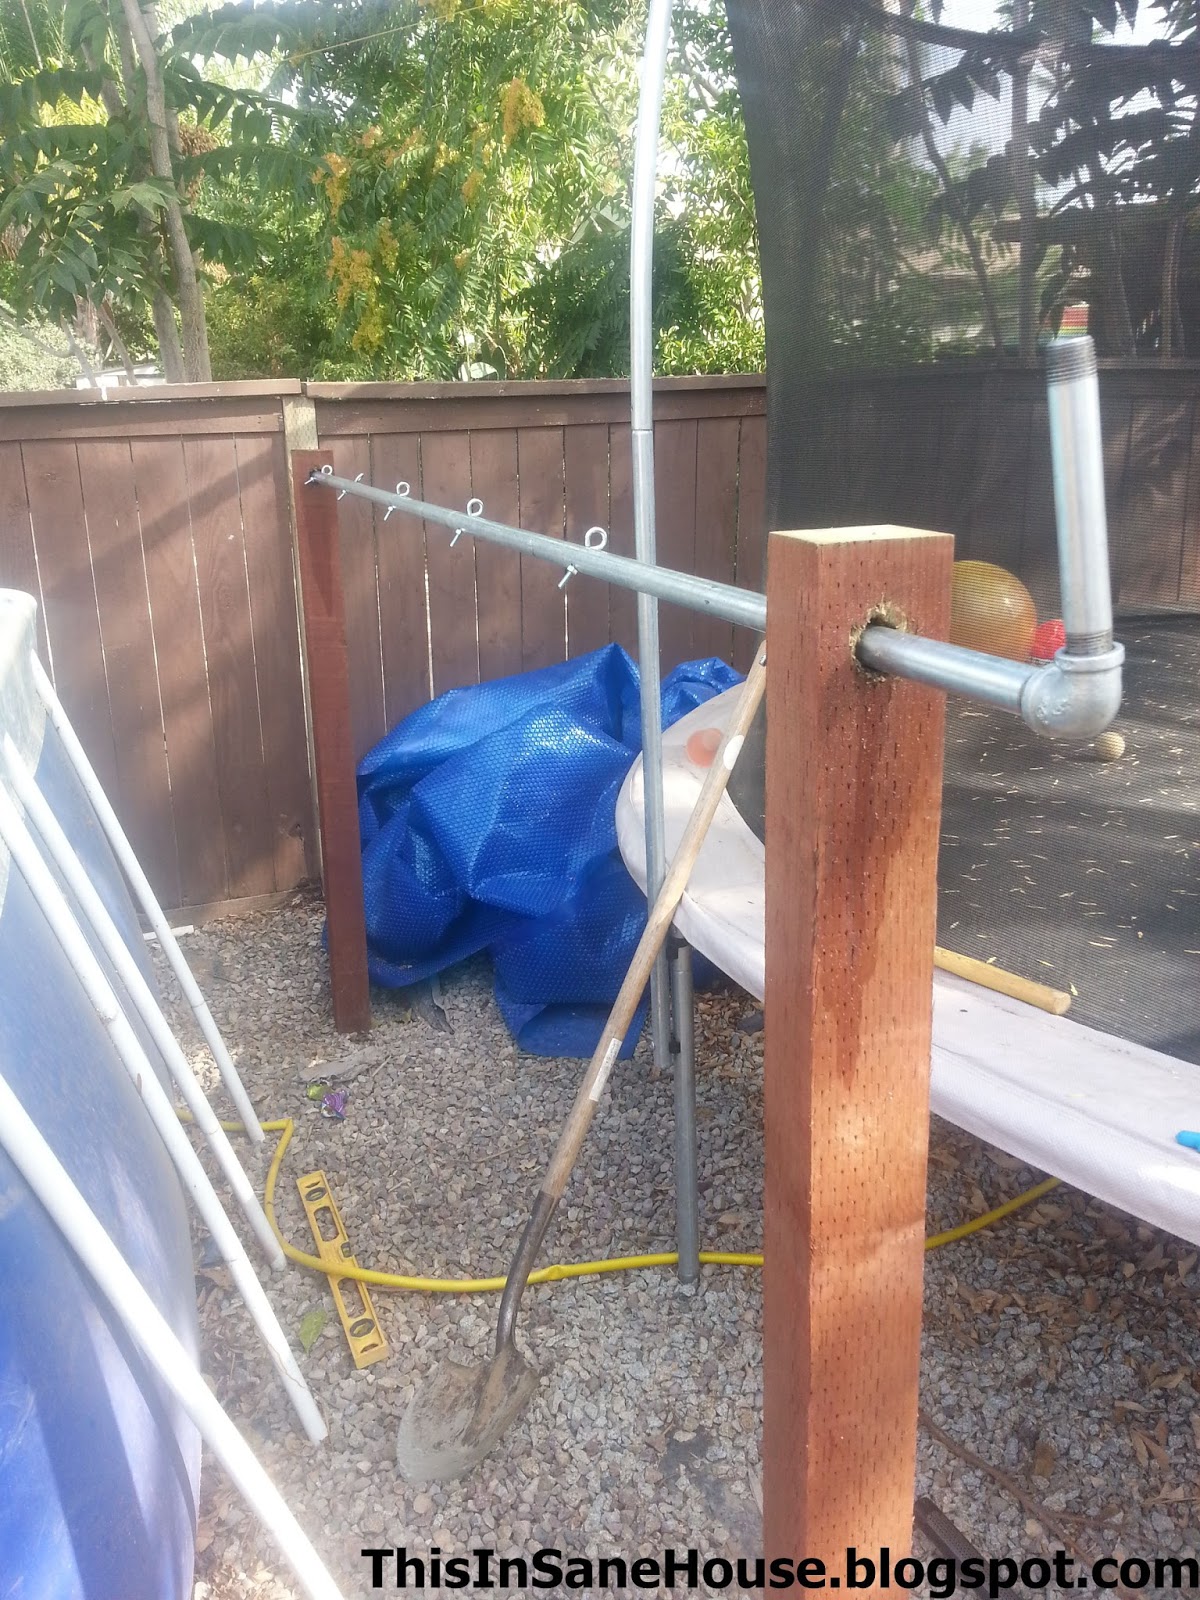
On the end without the crank, I just put the blue rubber pimp end cap back on so it wouldn't come through the hole.
You could also drill another hole in the pipe on the far side of the post and put a bolt and nut so it would never slip through.

Preparing the solar cover:
Cut the solar cover to width, by lining it up on one side and then cutting along the top of the support rails.
If you have stairs cut slits for the star rails.

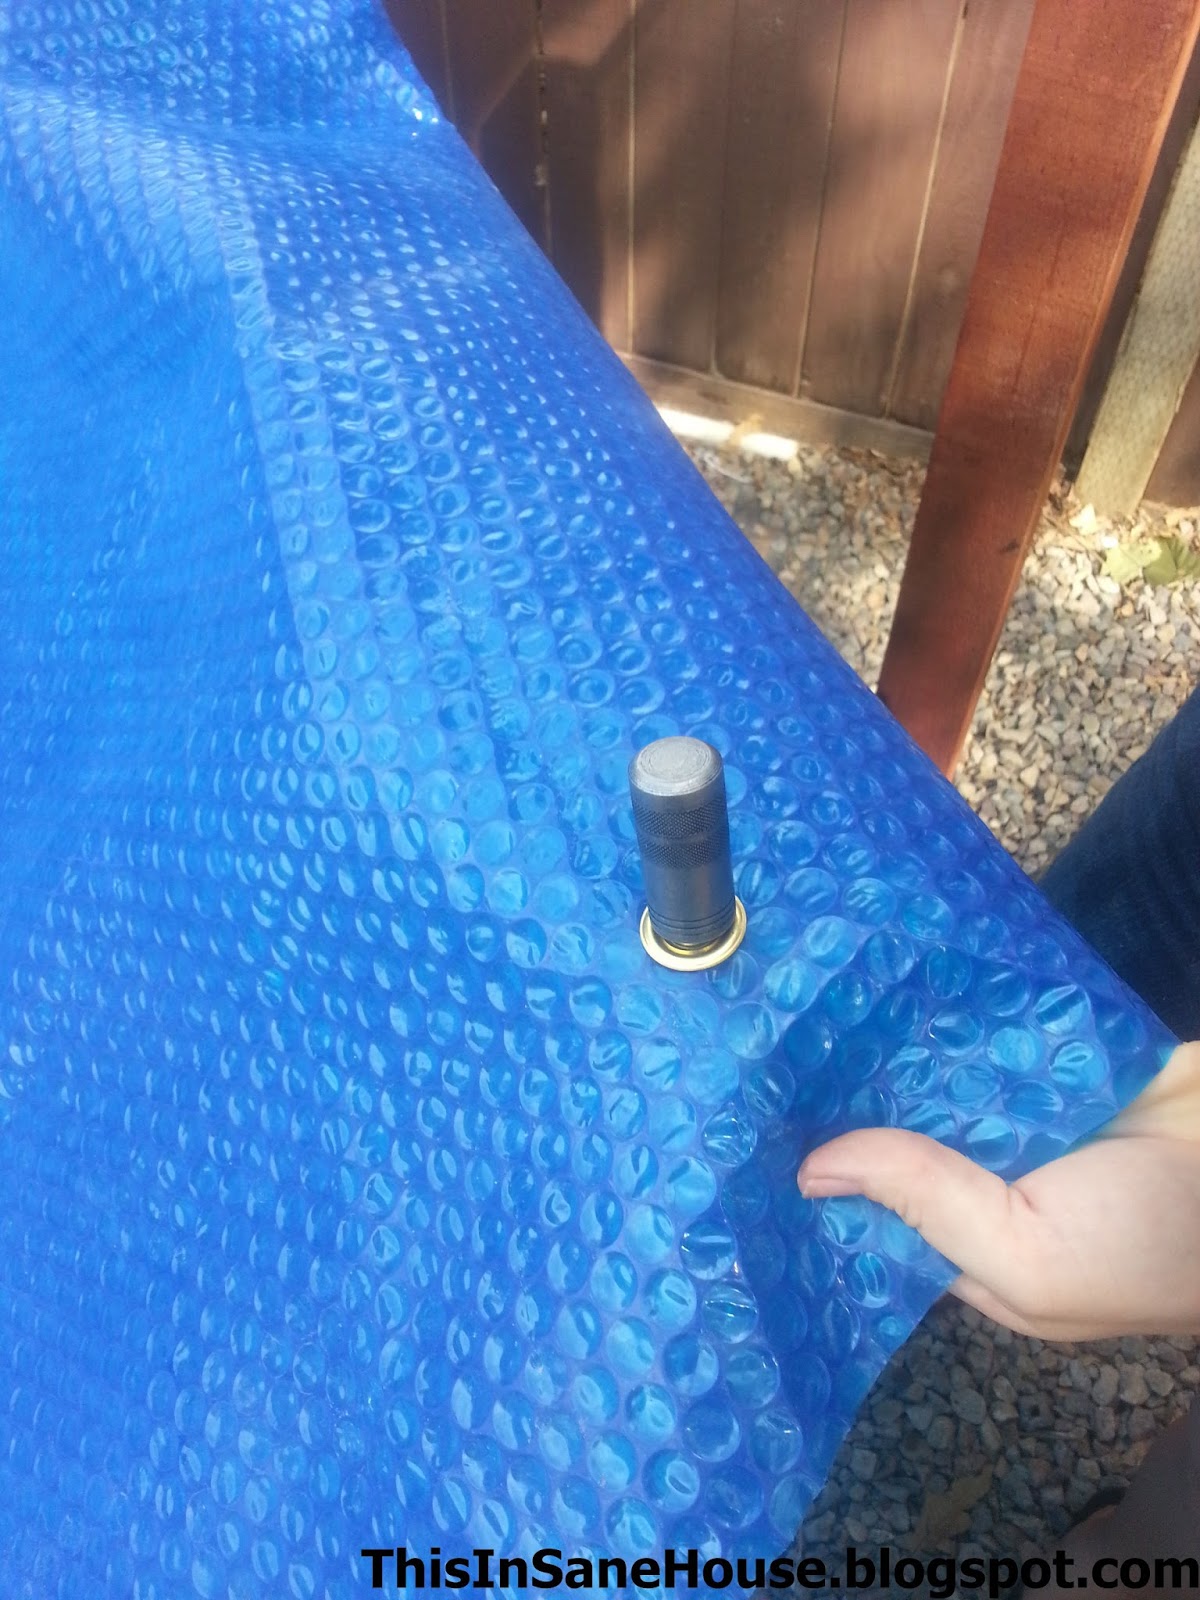
Line the tarp up with the pipe and mark where the eyelet bolts are, about 2" from the edge.
Use the hole puncher tool on some cinder blocks or something hard, then line up the grommet and tools in this order: hard bottom tool > grommet face up > tarp > washer face down > large punch tool and whack it with a hammer a few times.

Attach the grommets to the eyelet bolts with zip ties and TADA!!!!

Now it's so easy to put your cover on and off. This will keep your pool cleaner, chemicals less affected by the elements, and most importantly WARMER!!!
Don't forget to paint or seal your posts so they'll be sun and water resistant.
Here's our first test, works great! My only qualm is that I didn't space the posts quite far enough so the tarp wouldn't fold over itself, but it still does the job!
cool! wanna try this at home for the kids.
ReplyDeleteIt's worked out amazing. Cheap and quick project that makes your life easier and your pool more swimmable and sustainable.
DeleteThis is perfect! We've been meaning to ask someone from pool service phoenix to create a solar cover reels for our pool, but making it yourself seem more interesting. Thank you for this DIY project!
ReplyDeleteGreat, I want to do the same but a hidden version of it. I dont have my pool yet. I'm planning to build a full deck all around and want to hide the solar cover reel under the deck. Can you give me an approximate idea of the rolled cover diameter ? It will give me an idea of the size I need under my deck to hide the cover.
ReplyDeleteThank you so much for making this! Now my husband can SEE what's been in my head !
ReplyDelete