Image Map

Wednesday, August 14, 2013

DIY: Solar Cover Reel for an Above Ground Pool

Solar cover reel completed
Shopping list:
Solar cover
10 foot 3/4 inch metal pipe with threaded ends (this was for our 9' wide pool)
3/4" female 90 degree fitting
4" long 3/4" nipple
2: 4x4x8 treated lumber posts
6: 3" long 1/4" Eyelet bolts
2 Bags of 60# concrete
 Grommets
Large zip ties
Gravel (optional)
Paint or sealant

Tools you'll need:
Grommet kit
Hammer
Wrench
Tape measure
Shovel
Level
Drill
1 and 1/4" spade bit
1/8" and 5/16" drill bits
Miter saw (preference) or circular saw or hand saw
Wheelbarrow (optional)

Getting Started: Set the posts
Start by digging 2 holes at least a foot beyond and 6" to the left and right of the metal supports of the pool. Use the pipe as a measurement to make sure it will fit between the posts you will place in the holes. Make the hole's diameter 1 foot and depth 18 inches.  


Depending on the height of your pool you might want to cut the posts.  Ours is 52" tall, and I only wanted it to be a foot above it, so I cut the posts down to 82".  
52(pool height)+18(hole depth)+12(height above pool)=82"


To help keep the posts level, put a few inches worth of gravel in as you check the level on the post.  Remember to keep the posts symmetrical as much as possible. Use a post level to ensure your post is perfectly upright prior to the next step.


Mix a bag of concrete in a wheelbarrow.  Slowly add water and stir with a shovel or hoe (my preference) until it has the consistency of creamy peanut butter.  Take your time with this, you don't want it too wet. 


Fill the hole with concrete making sure to check the level often, then cover rest of the hole with gravel if there's any room left.  Repeat for the other pole.


Putting the eyelet bolts in the pipe:
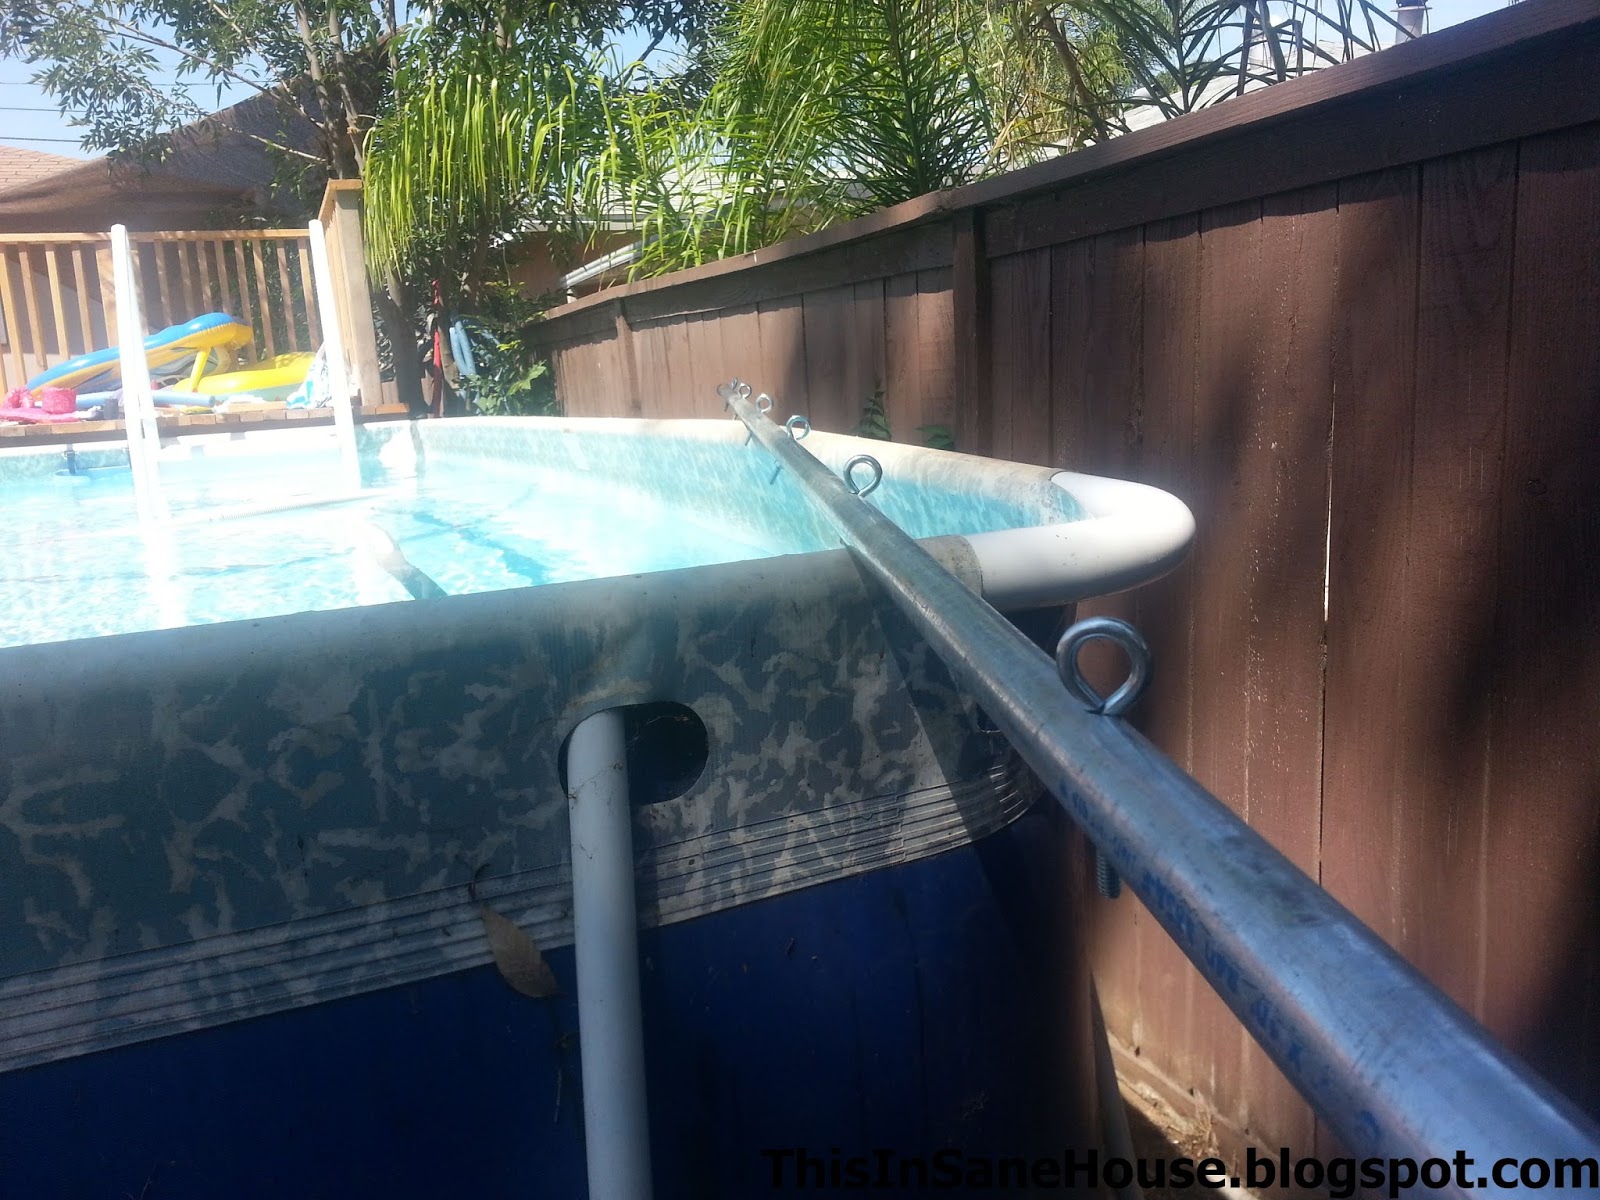
Space the eyelets evenly through the pipe, one on each side nearest the posts, then about every 18"-2'.  Drill a tiny starter hole with an 1/8" bit, then drill through it with a 5/16". 


Push the eyelet bolts through the hole and attach the nut, tighten with a wrench.  


Drilling holes through the posts:
I put the pipe on top of the posts to give me a good idea where I needed to drill the holes and at what angle, because my posts weren't 100% facing each other.  I drilled about 4" from the top of the posts using a 1 and 1/4" spade bit.


Once drilled, I sprayed the holes and pipe with WD40 then pushed the post through on one side (I had to remove one eyelet bolt for this step), then back through the other side.  Attach the 90 degree fitting and nipple with a wrench.
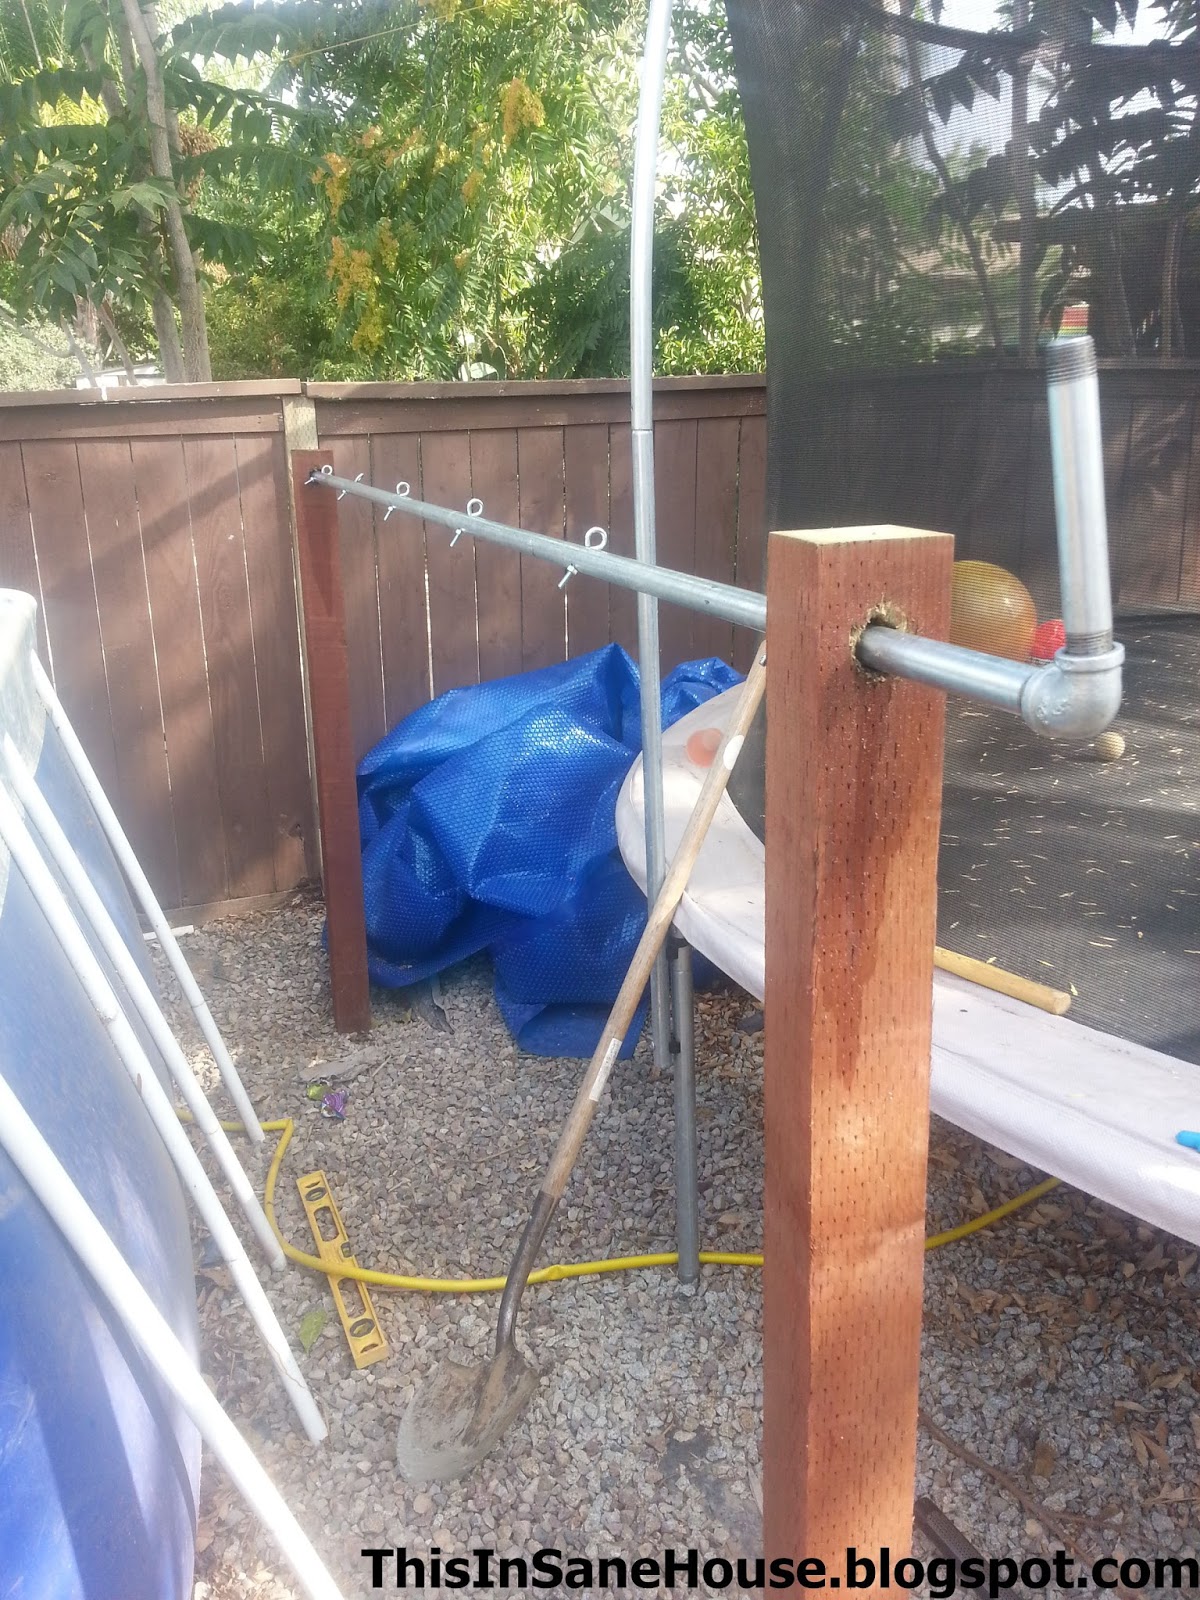

On the end without the crank, I just put the blue rubber pimp end cap back on so it wouldn't come through the hole.
 
You could also drill another hole in the pipe on the far side of the post and put a bolt and nut so it would never slip through.


Preparing the solar cover:
Cut the solar cover to width, by lining it up on one side and then cutting along the top of the support rails.
If you have stairs cut slits for the star rails.


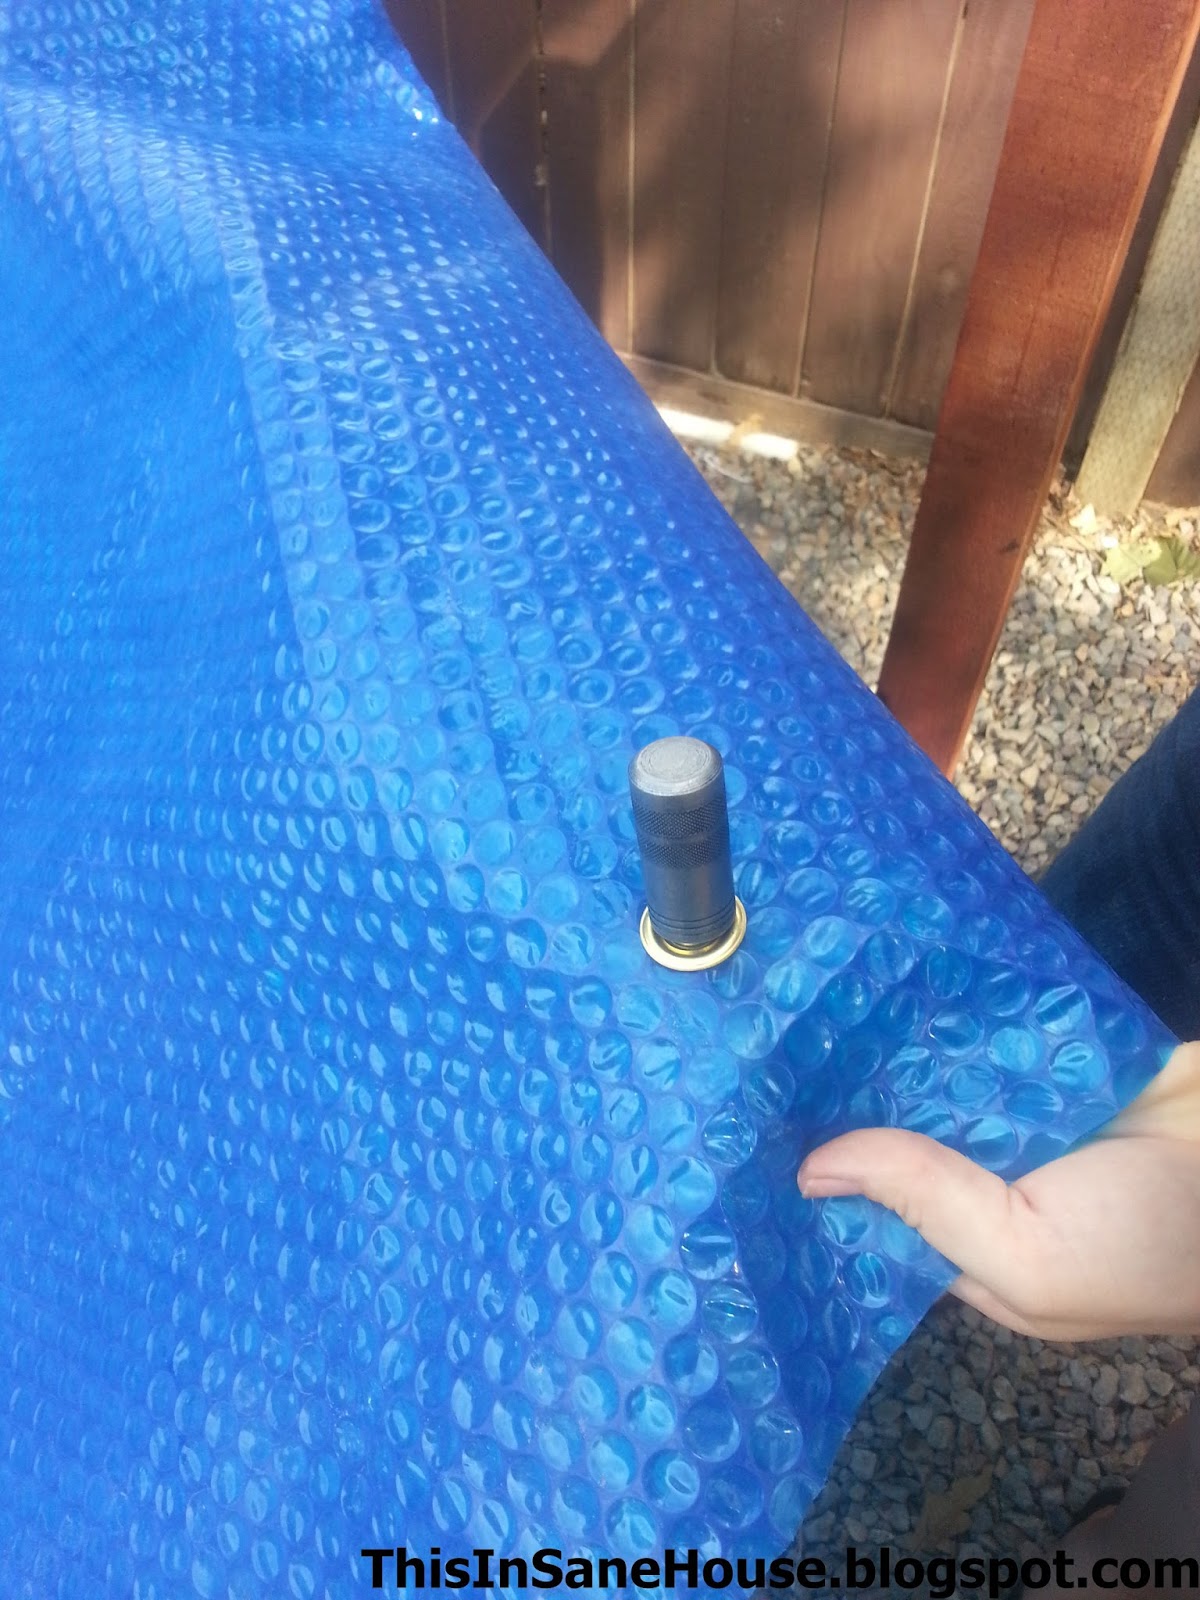
Line the tarp up with the pipe and mark where the eyelet bolts are, about 2" from the edge.

Use the hole puncher tool on some cinder blocks or something hard, then line up the grommet and tools in this order: hard bottom tool > grommet face up > tarp > washer face down > large punch tool and whack it with a hammer a few times.


Attach the grommets to the eyelet bolts with zip ties and TADA!!!!


Now it's so easy to put your cover on and off.  This will keep your pool cleaner, chemicals less affected by the elements, and most importantly WARMER!!!

Don't forget to paint or seal your posts so they'll be sun and water resistant.


Here's our first test, works great!  My only qualm is that I didn't space the posts quite far enough so the tarp wouldn't fold over itself, but it still does the job!

Sunday, August 11, 2013

DIY Concrete Edger or Retaining Curb


During our backyard remodel project last year, one of the biggest projects we took on was creating a concrete curb to surround our play structure. We were going to be adding 6 inches of playground mulch to the area (in the hopes it would keep our crazy son from breaking anything). But, before we could load up that area with mulch we needed something to contain it.

Enter: the curb idea. It was so simple at first. "Hey! Why don't we put in a concrete curb like you see at the park! That way we can make it into any shape we want!". Poor, dumb people.

Professional curb installers use what is called a "curb extruding machine". Sadly, no where around these parts rents one. This left us to figure out how to do it on our own.


Supplies:
4x8 Hardboard: Have the people at Home Depot or Lowes cut it into 6" (or whatever height you want your curb to be) lengths.  You get 8-8' pieces out of each 4x8 sheet.  You need enough to go the length of the curb times two.
Concrete (27 bags at around $2.70 a piece)
Concrete mixer ($25 rental)
Water
Wooden stakes
Screws (any kind will do)
4x8 OSB: cut to size for spacers ($8)
Pam cooking spray
Flat head shovel
Broom
Concrete curber
Concrete scorer
Concrete float
Garden hose
Several helping hands: we did it with 4 people, but 5 would have been nice
Beer!

Overall cost of project (with borrowed tools): around $125

First you want to mark out your border. The easiest way to do this is to lay an old garden hose on the ground and shape it until you are happy with how it looks. I would advise to keep your curves large and smooth. Avoid sharp turns, as the hardboard may crack when forced into extreme angles.


Next, take a flat shovel and begin smoothing out the area, following the shape of your garden hose. Once you have smoothed out the shape clearly with the shovel, move the hose and go over it one more time with the shovel.

Next hammer a few wooden stakes along the perimeter of your shape.

Depending upon how wide you would like your curb, cut a block of wood to use as a spacer. This will be the block of wood you wedge in between the front and back board as you go along, ensuring the curb is uniform throughout. In our case, our curb was 4 inches wide and 6 inches tall. So our spacer was 6" tall and 4" wide.


Attach your hardboard to your steaks using screws. Make sure you place your spacers as you go along. We would adjust the position of our steaks and hardboards to ensure a snug fit with our spacers.


Once you have your curb outlined with steaks and hardboard, with spacers placed throughout,it's time to bust out the Pam. That kitchen helper isn't just for pans you know. Spray the inside of your form generously with pam. This will ensure the forms separate from the curb cleanly. Now you can begin the concrete process.

We rented a cement mixer from home depot, and with the help of a friend with a truck we brought it and 27 bags of concrete mix home.


Trent began mixing the concrete following the directions on the bag. This was how he spent hours of his day. Once a batch of concrete was mixed, we dumped it into a wheelbarrow and trucked it over the the edger.


We had to work fast as it was another hot day (which is everyday between March and November) and the concrete was setting fast.


We shoveled concrete into the forms one small section at a time. As we poured in the concrete we would remove the spacers.
 
Using a concrete float, first I stabbed down into the concrete to release air bubbles, then I smoothed the top until there was a nice sheen of water. Then we would pour the next section and repeat.


If you want the curb to have nice rounded edges, you can purchase a concrete edger. Once the concrete is partially set (doesn't look shiny wet), you run it along the edges and it creates the smooth edge you see in professional curbs.

At this point you should lightly brush the top with a broom to create a texture.  This gives the concrete a more pleasant appeal, and creates a non slip surface.  Since the kiddos would be playing on the curb, this was very important.

Make sure that every two feet you score your curb. This means creating a line indentation along the top. When dry, concrete wants to crack. It needs to crack as part of the settling process. Creating score marks gives the curb a place for pressure to be released and crack if it needs to.


Keep your forms on and concrete wet according to your concrete bag instructions. For us, we watered it multiple times a day for 48 hrs. This allowed it to cure nice and strong before we took off the forms.


 Right after we removed the forms.


Look! A concrete playground edger!!

After all that hard work, when the weed cloth was laid and the mulch poured in, it was worth it!

 Before:


After:


It was an all day project, and it sure left us sore the next day. But in the end we had a nice safe place for the kids to play. Worth it.


Thursday, January 24, 2013

Sick Weeks

Our house should be quarantined. First it was a nasty cold about a two months ago. It seemed to last forever. Then I started having really bad pain in my jaw and ear. Next, Trent caught the flu. Luckily the kids and I had our flu shots, so I am hopeful we will skip that particular type of torture.

While most of it has now passed, that pain in my jaw and ear has now spread halfway up my face and into my throat. My dr. has no idea what is going on.


So while I would love to tell you about our trip to the snow that ended up with our van getting stuck,


or perhaps about Gabriel's third birthday party and all the really great things we made for it,


 instead I must prepare myself mentally for a visit with an ear, nose, and throat specialist and a dentist all in the same day,

and promptly take a nap.


I promise to regale you with stories of our snow adventure, and all of the great DIY projects and finds for Gabe's birthday. But for now, after fighting with whatever is going on with me for the last two months, I am just toast. Wish me luck tomorrow.


Friday, January 4, 2013

Getting Stuff Close

If only that title said "Getting Stuff Done", but sadly the cold circulating around has really hit our house hard. Poor Abby cannot breath, leaving her unable to use her bink. No binki = no bueno in our house. Add to that the molars coming in, and she is a sad mess.

Gabe seems to finally be on the mend, but his cough kicks in at night. The adults in the house are trucking along, although there are times when Trent's face looks like it might melt off.

I think Nicholas is the only one able to avoid this bug. Lucky jerk.

Despite feeling crummy, we are doing our best to get prep work done for a special event. Gabe's 3rd Birthday party! It is so surreal to me that our funny, stubborn, and smart little man is turning 3. I am so happy we will be able to celebrate in a fun, exciting, and fitting way.

For today I am done with the prep. Now I am off to eat oranges, while drinking orange juice, followed by a chaser of NyQuil and tea.

Night!

Thursday, January 3, 2013

Eggnog Quick Bread

It seems every January I find myself staring at a half empty carton of eggnog. We buy it throughout the holiday season, but after Christmas it just sits there. Sad. Ignored. Forgotten.

Inevitably I end up pouring it down the drain, hurting it's pride. Not this year. Thus my hunt for, and modification of, a great quick bread recipe.

Now this is a bread in the way a cake could be called a bread if it was baked in a bread pan. It is sweet, made my house smell divine, and went wonderfully with a cup of coffee.

Eggnog Quick Bread adapted from Allrecipes

2 beaten eggs
1 1/2 cups eggnog
2 teaspoons of rum
3/4 cup white sugar
1 teaspoon vanilla (be generous)
1/4 cup applesauce
1/4 cup butter, softened
2 1/4 cup all purpose flour
2 teaspoons baking powder
1/2 teaspoon salt
1 teaspoon nutmeg

Begin by creaming sugar, applesauce, and butter.


The mixture will look a little different because of the applesauce, but this is ok.


Next, lightly beat 2 eggs.


Add eggs, eggnog, and vanilla to the butter/applesauce/sugar mix.


Now, here comes the part where you have a choice. The original recipe called for rum extract. At my local grocery store rum extract was $6 for a small bottle. Paying that much for a few tablespoons kinda defeated the purpose of this bread (a quick way to use up what I have). I chose to instead use some rum I had on hand.


Don't be scared. The alcohol cooks out during the baking process. But if you are super worried you can always fork over the cash for the "extract". Your call.

Add the rum to the wet mix and stir. Then sift together your flour, baking powder, salt, and nutmeg.

Slowly incorporate your dry mix into your wet mix, until just moistened.


Pour that delicious smelling concoction into a lightly greased loaf pan.


Bake at 350 degrees for 50-65 minutes, or until a toothpick inserted into the center comes out clean. Mine took 65 minutes, and then this was what I had:


Yum! Allow to cool for 10 minutes, before turning out onto a baking rack to finish cooling.


Once cool, slice up and enjoy with a fresh brewed cup of coffee in a monkey mug. Oh, you don't have a monkey mug? So sad. This eggnog quick bread will be delicious regardless.

Enjoy!

Wednesday, January 2, 2013

Back and Forth : How the New Year Feels

2012 was a weird year for me. The two years prior I had brought new little people into our family. There had been huge house projects and big changes. In comparison 2012 held a lot of half finished things.

The backyard makeover that started with such promise has been left incomplete. The deck, sod, fire pit, and numerous other pieces laying half done.

The feeling of  half-done extends in to the house with little projects everywhere looking sad and abandoned.

Part of it has just been time. Hubs worked two jobs for the majority of the year and I went back to school (so grateful!), however that doesn't temper the sting of feeling lacking.

Perhaps it was a good thing this year was slow. A blessing to refocus our priorities. But it is hard for me to look around and not tally up all we have to tackle this year in addition to our plans for 2013.

2013 is going to be an adjustment. Hubs and I will both be going to school, in addition to him working full time. Abigail is getting bigger, and it is hard to believe but our little Gabe is turning 3 this month!!

We have big plans for the homestead this year. A main bath remodel, moving a wall and building a custom wardrobe in the master bedroom, new counter tops in the kitchen, and new storage system in the kids closet. All this in addition to finishing up the projects from last year.

I think my big goal for 2013 is two fold: be realistic and knowledgeable about the time you have. Having plans for big projects is great, it keeps you driven. But having unrealistic expectations about the time available for these things will only create disappointment. My family needs time first, the house will have to wait. And my feelings of failure over projects needs to shift to joy at the abilities and joy my children display every day.

Happy New Year!


Sunday, December 30, 2012

Christmas Came to These Here Parts

Christmas around here always sneaks up on me. I start shopping, planning, and celebrating months in advance of the big day but every year it seems I find myself on Christmas eve shocked that the time has come. 

This year was especially fun now that Gabriel and Abigail are a little older. Gabe new what Christmas was and couldn't contain his excitement. He was quite the little helper in the kitchen, and put a great deal of energy into making special presents for family. 

Abigail was in awe of the tree. Several times a day she would delicately touch the tips of the branches and say "Pretty tree". Then, once I wasn't looking, snatch one of the pretty ornaments off and go running. Sneaky girl. 


Sadly, I think this will be our last year with a real tree. In my family, fake trees were sacrilegious, so the thought of owning one makes me feel like a traitor. I also relish going to the tree yard, the smell of the trees, going through at least a dozen until I find the perfect one. But as I am the only one in our house who enjoys the tradition (Trent tolerates my eccentric tree ladyness, and the kids could really care less), and this year our tree seemed to die fast, I figured we could try the fake tree thing. 

Maybe I will just get a small real one for our master (ha, ha, ha I mean shoe box) bedroom. We'll see. 

We spent the morning of Christmas at home, enjoying coffee, breakfast, and the fun of shiny new toys with intact parts. Nicholas was thrilled with his new Nintendo 3DS and kept marveling us with it's different features.


After Abigail had a morning nap, it was of to Grandmas to celebrate with Trent's family. That many people (5 adults, 1 teen, 3 kids, an infant, and a dog) in a Christmas present filled living room was crazy, but so much fun! As a Christmas present to my mother in law we all wore pj's. Beyond the materialistic, our gift to them was 5 bazillion homemade cookies. Well, maybe not that many but pretty close. Snicker doodle, no bake chocolate cookies, gingerbread men, and chocolate rolo cookies. 


Overall, a blessed day of food, family, and a reminder that while our family keeps getting bigger we have plenty of crazy love to share.