Image Map

Tuesday, September 17, 2013

Roasted Marshmallow Pumpkin Bars


If a s'more and a pumpkin pie had a baby, these would be it.

These lovlies are mind blowing. You can be dainty and eat them with a fork, like I did. Or grab one in each hand and enjoy. 

Roasted Marshmallow Pumpkin Bar (modified from Better Homes and Gardens Cookbook)

2 cups all purpose flour
2 teaspoons baking powder
2 teaspoons cinnamon
1 teaspoon pumpkin pie spice
1 teaspoon baking soda
4 eggs, beaten
16 oz. can of pumpkin
1 cup sugar
3 ripe bananas
1/2 bag mini marshmallows 

Preheat oven to 350 degrees


Place all of your dry ingredients into a bowl (except sugar!). Enjoy the fall smells from the cinnamon and pumpkin pie spice.


Whisk together the dry ingredients with your King Kong whisk.


What, you don't have your own personal King Kong to whisk up all your kitchen goodness?


Place your three ripe bananas in a separate bowl. Use a potato masher to smash them up.


Mmmm, smashed banana goodness.


Place all wet ingredients and sugar into your mixer bowl. 


Mix on medium until well blended. Look at that gorgeous pumpkin color!


Get your helper to add the dry mixture into the wet, slowly to avoid lumps and poofs of flour everywhere.


Lots of helpers in this house.


Pour your mixture into a greased 9*13 baking pan. Bake for 35 minutes or until a knife inserted in the center comes out clean.


Ta Da! Your house will smell incredible. It really captures the smell of pumpkin pie. But here comes the fun part.


Spread a 1/4 to 1/2 bag of mini marshmallows onto the bars. More or less depending on how thick you want the marshmallow topping to be. We went with half.

Enjoy a few (or a handful) of marshmallows. For testing purposes.

Place back into the oven for about 5 minutes, with the setting changed to broil. Keep an eye on it!! Marshmallows can go from roasted to burnt really fast.


Fresh out of the oven. You will be ridiculously tempted to cut into them, but be patient. Allow everything to cool a little, and the marshmallows to firm up.


Look at that! Thick like a slice of pumpkin pie, and that roasted marshmallow top adds a touch of sweetness.


So good you can't eat just one. Go ahead, have another. I wont judge.


These called our name every coffee break or heck every snack break. Make them. I promise you will not regret it.

If you do make them, let us know! Have another pumpkin recipe you love? Share it with us!

Nutrition Information
Serving - 1
Servings per Recipe - 16

Calories  181
Carbs        39
Fat              2
Protien       4
Sodium  104
Sugar       22


Saturday, September 14, 2013

Abigail's 2nd Birthday: Minnie Mouse Luau Party


Happy birthday Abby! Our little girl turned 2!


Abby has so many wonderful interests. Books, cars, coloring, accessorizing. But two of her favorites right now are swimming and Minnie Mouse. In planning for her birthday and thinking of ideas it became apparent there was only one great option: Minnie Mouse Luau and Pool Party!


When guests first arrived they were greeted with a giant Minnie Mouse hanging on the garage.

Making this was incredibly simple. A $5 sheet from Walmart, $3 can of black spray paint, and leftover tulle from her tutu. I traced out the Minnie head in pencil, then sprayed it in with spray paint. After it dried I connected a tulle flower with hot glue. Viola! Instant party announcement.


We spread the Minnie Mouse luau theme throughout our backyard. On our deck I attached green table clothes to the bottom, then sliced it to create a grass skirt appearance. To the rails I attached a fantastic flower garland that I ordered here.


Our garden fence received a colorful face lift with the addition of flower garland and Minnie Mouse heads. We also used the fence posts to display all the flower leis for everyone to pick and choose from.


Our trampoline became a tropical splash pad! We hung palm tree streamers from the posts. To turn this plain trampoline into a splash pad, we ran a garden hose and a little sprinkler under the bottom. Once turned on it splashed and sprayed everyone whenever they would jump.


Even the swing set club house displayed Minnie Mouse fun! I traced and cut a Minnie Mouse head on card board, spray painted it black, and attached a tulle flower. The kids loved pointing out all the Minnie's around the yard.


This has to be one of my favorite additions to the luau. A Minnie Mouse bean bag toss. Trent will expand upon this himself, but it was a fairly straightforward project that was a blast to play with.


To make the bean bags I traced a Minnie outline onto some scrap felt I had then hand stitched them closed. Too lazy (and busy) to drag out the sewing machine.


The happy birthday girl!We set up a bubble machine on the deck rail, and Abby was more than happy to run through the sea of bubbles covering the yard.


For birthday photos I picked up these coconut containers from our local Dollar Tree. They were cute on their own, but needed to be more festive. I traced Minnie Mouse ears onto card stock then cut and hot glued them onto the lids. The flowers came with the containers, but after designing the Thank You tags I attached them onto the flower stem.

Inside was a Minnie Mouse cookie and Minnie Mouse stickers.


Favors for kids and adults alike. Paper fans (it was hot!) and tropical clackers.

Gabe thinks they are magic wands. Works for me (a lot less noisy) ;)


Everyone spent a huge amount of time at this table. Sugar cookies to decorate with pink frosting and sprinkles, vegetable tray, fruit skewers, and goldfish. We also had large metal tubs filled with waters, sodas, and juice boxes.


We wanted to do something special for the meal that allowed our guests to be involved. Grilled flatbread pizzas!


The guests filled out a menu card then Trent and I would grill them up to order. Quick, fresh, and everyone was able to enjoy their perfect pizza.


A delicious flatbread fresh off the grill.


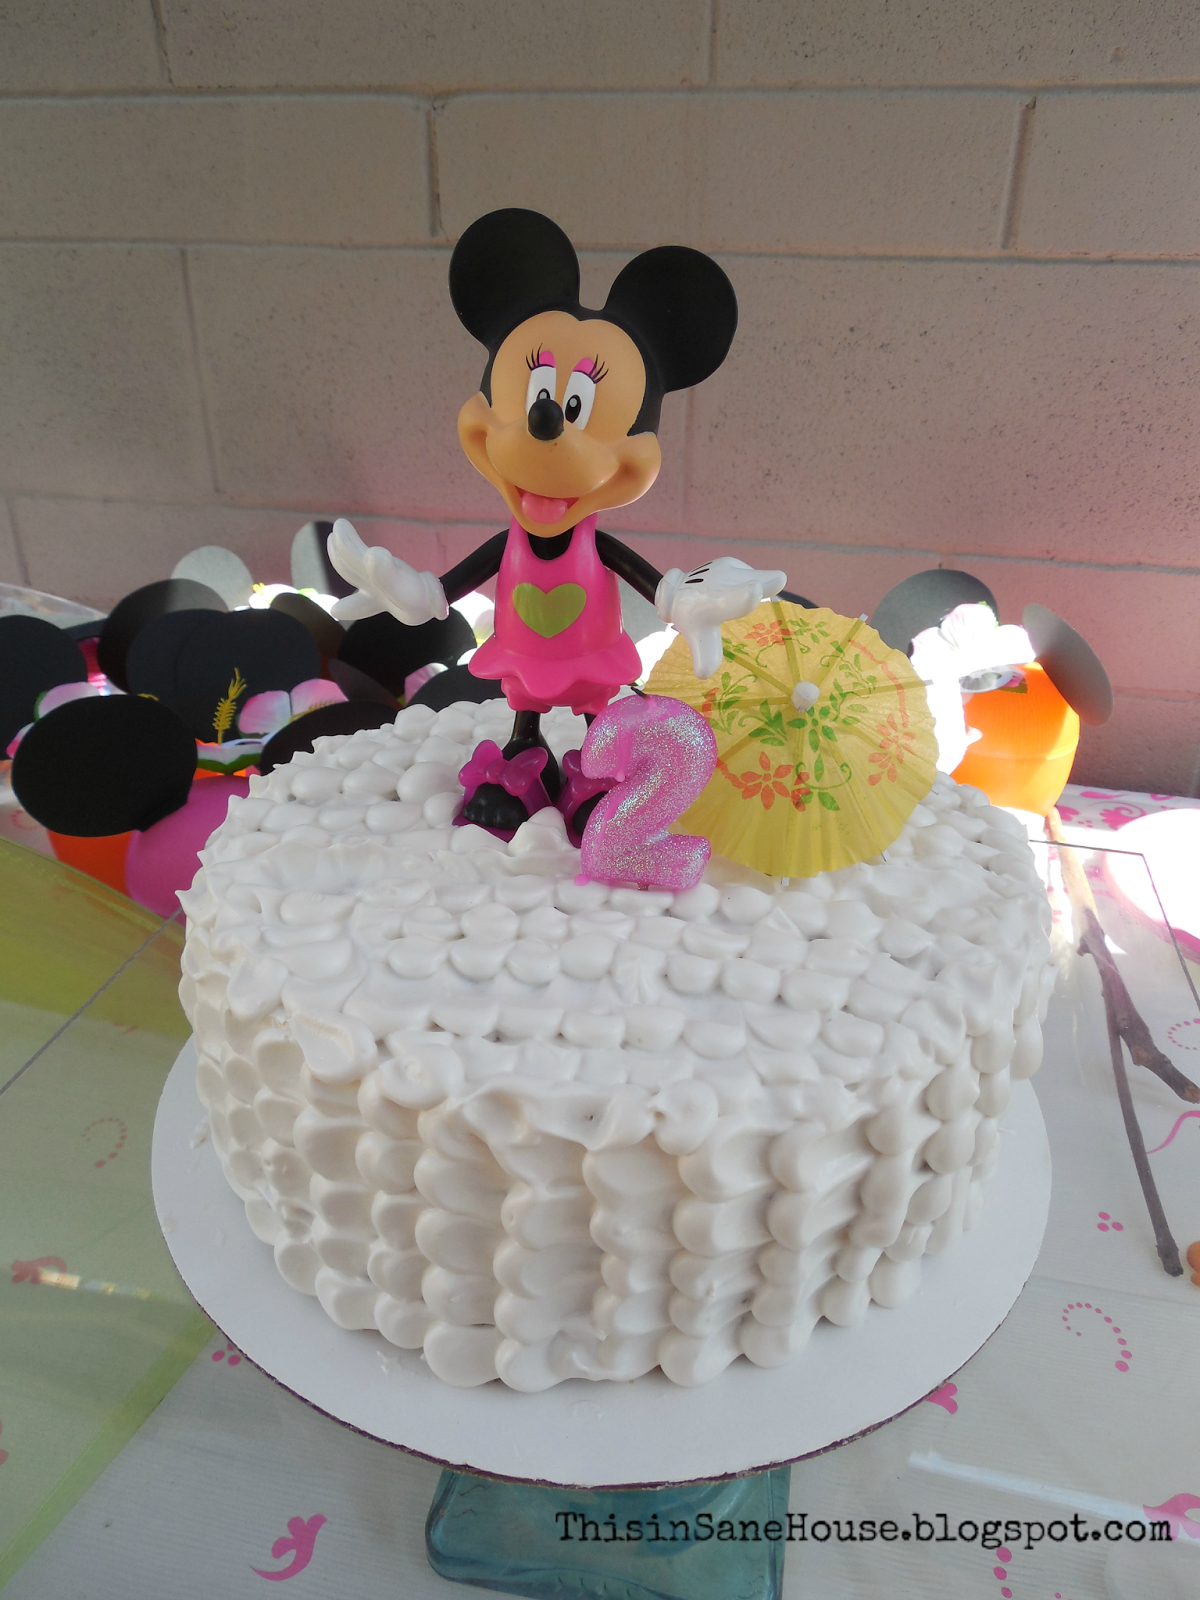
Then there was cake. Delicious cake.


Banana cake, vanilla custard filling, and lemon meringue frosting. Tropical but light. And most importantly, Abby loved it!


Side note: Abigail received this pink cozy coupe that day. She refused to leave it, even for cake. Trent had to pull the table up next to the car so she could enjoy her cake without leaving it. Silly girl.


And the happy girl, along with our wonderful family and friends all enjoyed a long dip in the pool on a hot day. Abigail, our little fish, could not have been happier.


A fantastic Minnie Mouse Luau to celebrate two years with this silly, loving, smart, precious little girl.


Happy birthday Abby! We love you!

Friday, September 13, 2013

Kitchen Backsplash on a Budget


Tools you will need:
  • Tile Saw
  • Margin trowel 
  • Wall trowel
  • Buckets at least 2
  • Towels
  • Pencils or sharpies
  • Tile spacers
  • Sand paper (optional)
  • Rubber Float

To save money, we purchased floor tiles from the clearance section of Lowes.  We got the last remaining 10 pieces of these dark 16x16 tiles for .72 a sf, and a 2 boxes of 12x12 tiles for .60 a sf.  The black marble tile was a splurge at $4.  With thin set, grout, and the cheap tiles, we ended up paying less then $50!

But we payed for it in labor.  To create all of those tiny pieces required hundreds if not thousands of cuts. 

Drawing the Accent Star
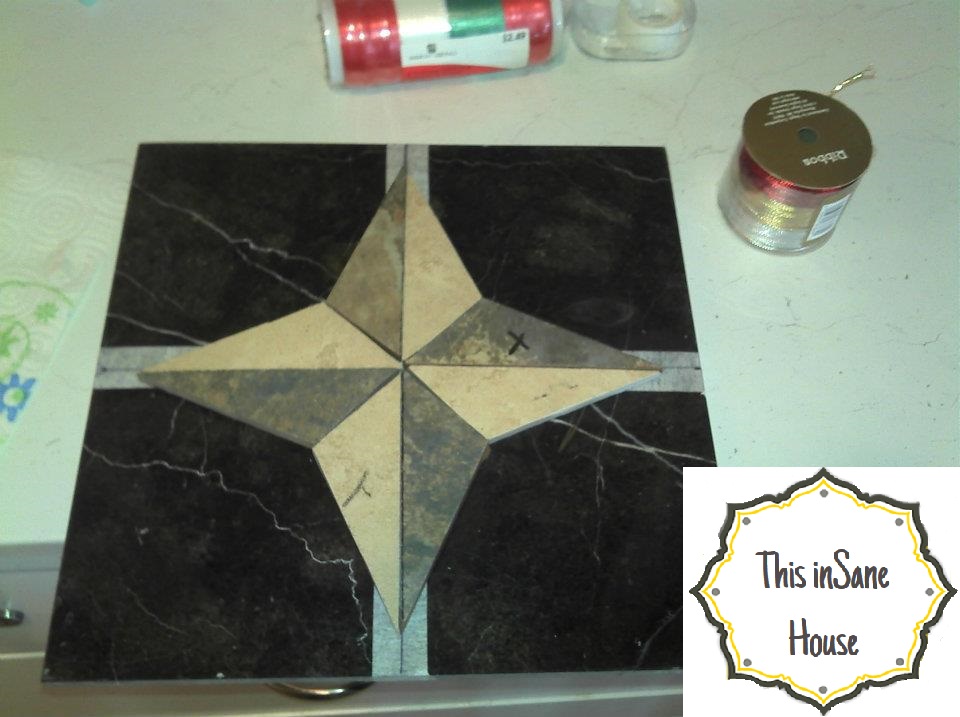
Here's a  great tutorial on drawing a 5 pointed nautical star.  For mine, I used a piece of paper starting with a center point (argh for not taking pictures!) and sketched 2 10" perpendicular lines centered at 5", then 2 5" perpendicular lines diagonally centered at 2.5".

You could also size and print an image from Google and use that.  Once I had my paper drawn, I cut out one of the triangles and used that as my template.  After cutting out all of the triangles, I had this:


I attached masking tape where I would cut the black marble because I couldn't see any markings on it otherwise.  To do the cutting, I cut it into 4 pieces first, then trimmed out the star section.  The marble was very brittle because of the veins, so be very careful and slow.  One tiny section broke off but with a little super glue and the star and grout pushing up against it, you wouldn't even know it was there!


Excuse the dirty crockpot in the picture
Here's the final product ready for some thin set!!!


HOORAY!
I measured out where I would need the star to go before taking the stove out.  Use a level to make sure it's perfect.


You can apply tile directly to drywall, but you should rough up the paint with some sand paper to get better cohesion.  Because the star was so heavy, and the marble was so slick, I had to screw some boards up to make certain it stayed put.


Here's a great tiling tutorial.   

I cut each piece to be 5 7/8" x 1 7/8."  The best way to do this is to make templates, and cut each piece exactly the same way to create cohesion.

Using the 12x12 tile, cut a strip that is 12x1 7/8."  This will be a cutting template to create more strips.  Use this template strip butted up against the edge to cut another strip.  Cut this one in half and it should be about 5 7/8."  This will be your final template.  Mark each template with sharpie, and don't lose them!   

When marking the tiles, make sure they are dry or the marking will bleed.  Find what marking techniques work best for you and the material.  I've used heavy pencil lines on certain materials, and sharpies on others.  If you use sharpie, rub it off right after you put it through the wet saw.  I hate the "tile pencils."   I find they don't give a good enough edge, and peeling the paper/sharpening them is awful.

Here's the 90% completed stove side.


If you look closely at the top of the tiles you'll see numbers.  I would number tiles and spaces that needed distinct cuts, so I could take out several without confusing what goes where.

I was working 2 jobs at the time so I only had a few hours a day to work on this project.  It took a long time!


Here I'm applying thinset to a trowel, and then putting it on the wall.  I found this to be too messy and imprecise because of the minimal working room.  It also didn't give you enough time to get everything perfect.  Eventually, I would just apply thinset to each individual which seemed to be easier.


Use spacers in every direction and make sure your lines are straight.  Check them with a straight edge of some kind often.  Also, consider how you want your outlets and edges to look.  If you want them inset, draw a box around where your outlet covers are and leave 1/8" space.  Also consider if you want a grout line in the corner or if you want the tile butted up against the wall. 

Since this project I've used the harder plastic spacers which have a lot less give to them, making it easier to hold straight lines and not have to keep going back to fix slippage.


Here's the finished view from the right side, without grout.


Here's the view over the sink.  There were a ton of tiny slivers below the windowsill.  Those were the hardest pieces to cut out of the whole project because they had a tendency to break, especially tiny L's.


Here's the left side without grout, breathtaking!


Abby sure loves it!


And here's the final with grout! 

 
If you have created a custom back splash, floor, or shower, I want to see it!  Comment below and share.

If you enjoyed this post, check out some of our other diy projects:

And don't forget to follow us for other great content!

Wednesday, September 11, 2013

Please Excuse the Mess

We are in shambles.

Just in case you're wondering, we are in the midst of a blog overhaul. Please be patient as we update links, photos, and pages.

We are aiming to make navigating around here and updating the content an easier process for us and a more enjoyable viewing experience for you all.

Within the next few days we should have everything working pretty. That is if the ear infection the kids keep passing back and forth doesn't take one of us adults down too.

Thanks for understanding, and as always we are so grateful you stopped by!