Image Map

Thursday, September 26, 2013

Run or Dye 5k: I Ran the Rainbow! Tips for a Colorful Run.


This May I did something I had never done before: I ran a 5k. When picking my first race, I needed something that wasn't serious. Nothing timed or competitive. Enter: Run or Dye

I'm sure you have most likely heard of a run like this in some form (Color Run, Color Me Rad, ect.). The Run or Dye 5k had a Groupon for $22, making this an inexpensive investment for a first run.

If you are unframiliar with these types of runs the gist is this: You run 3.1 miles. During your run there are 5 different color points. At each point you are pelted with Holi powder (technically Holi is an Indian holiday, and the powder is used in its celebration). 

Holi powder is colored, scented, and "technically washable". But if you do not want to sport the rainbow on your face, hair, and car for days on end you can take steps.

Tips for Your Colorful Run:

Hair:
Put leave in conditioner in your hair. 
While the color powders are fun and you will love having photos of you looking like a walking box of fruity pebbles, eventually you will want the color to come out. If you put leave in conditioner or coconut oil in your hair prior to the race, it creates a barrier between your hair and the powder. This will help all the color wash out. Remember to work it into your scalp as well to avoid long term purple scalp.


Skin:
Lather yourself in extra moisturizing body cream. The princaple is the same as the hair tip: the moisturizers create a barrier between your skin and the dye in the Holi powder.

Make sure to really work the moisturizer into the creases (inner elbows, behind knees, arm pit area, ect).

After the race, do not immediately use warm water to wash off. 

Think of washing stained clothing: cold wash only. 
Since I wasn't about to take an ice cold shower, I did a pre-wash first. I wiped down with baby wipes, which removed a huge amount of the color. Then I took a lukewarm shower, and used a loofah to remove the rest of the color from my skin.

Face: 
Waterproof makeup and moisturizer really help keep the color from staining your face. I also recommend you buy a cheap pair of sunglasses to protect your eyes. 

The Holi powder can also irritate your lungs, and tastes aweful if it gets in your mouth. Wearing a bandana around your neck allows you to protect your mouth when you run through the color pelting spots.

Clothes:
Don't wear anything you love. To this day my shoes are stained. 

Car:
This is something you really need to think about. The Holi powder will be coming home with you. Unless you like the tye dye look for your car, you need to take steps to protect it. 

Wipe down with baby wipes before getting in the car. Change your clothes if possible, bagging up your colorful shoes and clothing to deal with later. 

If you can, invest in some cheap seat covers. At least put towels over the seat and on the floor. If you had people there rooting you on, remember they most likely have Holi powder on their shoes too.

Above all, have fun! If you came prepared this can be a hugely enjoyable event, with no long lasting stains. 

Enjoy running the rainbow!


Have you done a colorful run? Share your tips or stories!


Wednesday, September 25, 2013

Drywall a California Patch Around Light Fixtures

Using a "California Patch," you can quickly patch small sections of drywall and have it blend in perfectly!


When we first moved into our house, we redid the majority of the drywall.  Unfortunately for us, we were in a huge hurry, and we had almost zero experience.  YIKES!  When we cut holes in the drywall for the light fixtures, we did it thinking that the covers would be a lot bigger then they ended up being.  So what we ended up with was ugly holes surrounded with high gloss paint that begs your eyes to stare at it in disgust.


To fix it, I had read and watched videos about the "California Patch" aka "Butterfly Patch" (personally I think it should be called the "Easy Button Patch" or the "No Screws Required Patch")  from several different websites.  It seemed to be the perfect fit.  But I had never seen anyone do it around a light fixture, or any drywall that had a hole in it.  So a new experience became a head-scratching new experience.

Here's some reference links to give you an idea:
Patching a Wall Using a California Patch
California Patch

I started by taking off the light covers and measuring the hole's diameter which was 6.5" (this was slightly larger then the holes diameter, but less then the diameter of the covers).  Because you need drywall around where the fix is happening, I made squares that were 9" with the thought process that at least 1" of drywall would surround the holes, and I'd have 1" of paper to attach to the ceiling.  If I had it to do over though I would have made them 11" with 2" of a drywall surround, and 2" of paper. 
*For reference take a look at the picture below

Once you have your square, use a compass with the radius (.5 the diameter) and draw a circle in the center of the square.  Use a jab-saw or whatever means you see fit to cut out the circle.  Since I was already trying something new and feeling adventurous, I decided to use a drill and a jig saw.  Surprisingly it worked out great!  I cut 3 patches at a time with ease!
 

Now turn your square over to the brown side of the paper, and 1" in (2" if you made the bigger square) on each side score the  paper, crack it backwards (towards the white paper), and peel the sheet rock off leaving the paper intact.

Take your patch and line it up over the light fixture with the brown paper up.  Bend each side of the paper back and use a sharpie to trace the sheet rock onto the ceiling.  Cut a little wide of the sharpie for an easier time getting the patch in.  Make sure the patch fits before you get out your mud.  I prepped each patch, numbered them so I wouldn't mix them up, and put a directional arrow so I knew how they laid.  This way I could do all the mudding at the same time.


Use some sand paper to rough the area where the paper will touch.  Clean it thoroughly and make sure it's dry.  Put mud on the underside of the paper, and push it into the ceiling (sorry no pictures, I was too in-the-moment).  Using a small drywall knife, apply pressure from the center out and squeeze excess mud out so the patch is tight.  

Next, apply mud from the paper onto the ceiling getting thinner and thinner as you go.  You want the paper to be completely covered.  You also want a smooth, gradual slope of mud.  Go as thick as you need to to cover the paper, and go as wide as you need to for the smooth, gradual slope.


After the mud drys, sand it with some 100-120 grit sand paper, and apply the next coat keeping in mind you're aiming for a smooth, gradual slope.  Almost completely horizontal.  Apply a lot of pressure to your knife and pull it at a 20 degree angle or so.  

If you were very careful, this patch can be done in 2 coats.  It took me 6!  Just kidding, I got it in 3 but my drywall skills have improved since then and I know this could be done in 2 coats.  Do the final sanding with some 180 or 220 grit sand paper.


The result turned out perfect!  I painted it, put the covers back on, and tucked the "California Patch" into my toolbox of awesome tricks.

Check out our DIY PAGE for other great do-it-yourself ideas and how-to's.

Tuesday, September 24, 2013

Winner, Winner, Chicken Dinner - I Won a Spartan Race!!

Last week I was feeling a little adventurous with my work outs. As in, "I think I'll try interval training! I can totally do that!". I know. Super exciting, right?

After one of these productive treadmill sessions, I came home and saw one of my favorite blogs, Random Rants of an Army Wife, was doing a giveaway. And not just any giveaway, a Spartan Race giveaway!

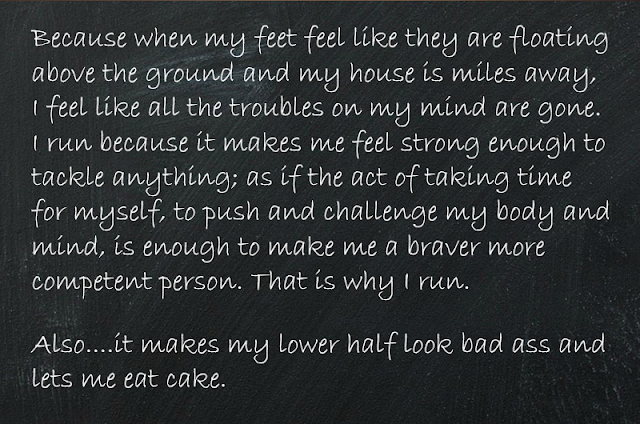
Blindly excited that the word "race" was in the sentence, I wrote about why I love running:


 I happily went about my day, moving on to the important things like hop scotch and hide and seek (my kids aren't the only ones that still play these, right?).

A few days later, low and behold, I get a friendly message: I won!! Wow! How exciting! How thrilling!

Then I looked at what a Spartan Race was.

How terrifying.

Think the love child of a serious 5k and a Crossfit Games. 

It looked fun. It looked challenging. It looked like the kind of stuff my wimpy upper half was unprepared for. Burpees? Pull ups? Army crawling through mud under barbed wire?

Dude.

Maybe this was just what I needed though. To be honest, I have been struggling on the fitness front. My moods have been all over the place, and even when I work out I don't push myself as hard as I can. 

My nutrition has been as bad, if not worse. Coffee and ice cream are not a special necessary food group. I need to remember that.

Now I have a goal. I will be running in the southern California Spartan Sprint in January. And I will be in the best shape of my life to do it. 

I met with a trainer today to start a weight training plan. For running, have a goal of hitting 15-18 miles a week, with 3/4 being speed training. I am dragging my butt out of bed at 5am tomorrow to make it to a boot camp class, because apparently I "have no ab muscles" (per the trainer) and bootcamp class can help with that.

It is going to be hard. But what about my journey has been easy? In the end I will be a Spartan. I will be able to say I made a commitment to myself and followed through. 

Thank you, Amber at Random Rants of an Army Wife and Spartan Races, for giving me back my drive and motivation. 

Have any of you run a Spartan race or something similar? Please share your training tips! And I will share my cookies. Or protein powder.


Preview of My Homemade Pac-Man Costume

DIY how-to soon to come, as soon as I get to getting it done!


Saturday, September 21, 2013

Abby's Breakfast Shenanigans

While Abby was sort-of eating her breakfast, I nabbed a video of her because she was being too cute!

Friday, September 20, 2013

Things My Kids Say #1

Over the last few weeks, my son Gabe has been saying some ridiculously cute things.


#1
"Daddy said he didn't want to go to school, but I told him, 'It's OK daddy, you can go to school.  There is nothing scary there, you'll be OK!'"

#2
One nap-time, while Gabe was asleep, Megan took the rug inside their room out, to carpet clean it.  When he woke up and noticed it was missing he said, "oh no where is my beautiful, beautiful rug!?" Oh no, that was my beautiful treasure rug," as he paces around the house looking for it.

"Where is it, where has it gone," he asked Megan.

"I washed it, it's out drying in the sun."

"What, it's outside!?  Oh no!  The sun's going to make it dirty!"
 
#3
Megan went grocery shopping, and while going over her list she says "We need to get fish." 

"Fish, but I don't like to eat fish," Gabe replies.

"Why not they're delicious?"

"But fish are too swimmy!  They're my favorite swimmers, I don't want to eat them!" 


 If you have some funny things your kiddo has said, I'd love to hear it in the comments!

Thursday, September 19, 2013

Minnie Mouse Bean Bag Toss


For our daughter Abigail's birthday party, we decided to make a bean bag toss shaped like Minnie Mouse to match the theme.  It was a huge hit, and very easy to make!  So lets get started!

First, I took measurements of our Minnie Mouse invitations for reference and set up a scale so the circle of the head would be 36".


I made cardboard templates to begin with.  You can get large sheets of cardboard for free at Costco if you ask.  Sometimes they're just lying in the box bins.  To make the large circle which was 36" in diameter, I used 18" of string tied to a pencil.  I cut it a little long, wrapped the end in tape, and then put a push pin through the tape and string at 18."


Push the pushpin through the center of the cardboard, and trace a circle with the pencil.  Try and keep the pencil at a uniform angle.


Next make the ear template.  The ears are supposed to be a 25"x15" ellipse.  Here's a great way to draw a perfect ellipse.  If you do it that way, your foci will be at 20".  But since Abigail's party was coming upon us quickly, I just made a 25" circle and a 15" circle, and then free handed the elliptical curve. 


After I had cut out the ear template, it didn't look exactly right so I reshaped it again until I had it perfect.  Well, good enough at least!  I cut out two templates for the ears and chose my favorite of the two, but I got a nice preview of how it would turn out!


Trace the templates on mdf or plywood.  Mdf is preferred because you won't have to sand it for a smooth paint job.  Luckily I had some left over mdf from another project.  Lift the pieces your cutting up with blocks underneath, and support around it as well.  Just be careful none of the blocks are in the cutting zone.


Lay the pieces out and screw it together with some 3/4" screws.  You can sink them a little deeper then the surface, wood putty and sand it if you want to.  I was in a hurry so I screwed them together and painted over the screws.


Draw and cut out your holes.  I put 1 in each ear, 2 for the eyes and 1 for a nose.  I used a tupperware lid that was a perfect size for this. 

To cut them, drill a hole on the inside of the circle close to the line with a spade bit preferably so it doesn't walk.  I used a 1/2" spade bit.  Make sure to support everything.


Throw a couple layers of paint on there!  We used Lowe's Chalkboard Paint.  Then we added a "flower" to keep the Luau theme of the party which was a couple pieces of tulle hot glued on. 

 TA DA!


Megan hand sewed some Minnie Mouse shaped bean bags to use, and the kids had a ball!


Thus far we're just leaning it up against a wall.  I'm still debating whether I should build a stand for it or not.  If I do, it will probably just be 2 2x4's cut at 45 degree angles on each side.  Eh, NAAAAA!  Looks good, works great, DONE!

Check out how the party went here!

Tuesday, September 17, 2013

Roasted Marshmallow Pumpkin Bars


If a s'more and a pumpkin pie had a baby, these would be it.

These lovlies are mind blowing. You can be dainty and eat them with a fork, like I did. Or grab one in each hand and enjoy. 

Roasted Marshmallow Pumpkin Bar (modified from Better Homes and Gardens Cookbook)

2 cups all purpose flour
2 teaspoons baking powder
2 teaspoons cinnamon
1 teaspoon pumpkin pie spice
1 teaspoon baking soda
4 eggs, beaten
16 oz. can of pumpkin
1 cup sugar
3 ripe bananas
1/2 bag mini marshmallows 

Preheat oven to 350 degrees


Place all of your dry ingredients into a bowl (except sugar!). Enjoy the fall smells from the cinnamon and pumpkin pie spice.


Whisk together the dry ingredients with your King Kong whisk.


What, you don't have your own personal King Kong to whisk up all your kitchen goodness?


Place your three ripe bananas in a separate bowl. Use a potato masher to smash them up.


Mmmm, smashed banana goodness.


Place all wet ingredients and sugar into your mixer bowl. 


Mix on medium until well blended. Look at that gorgeous pumpkin color!


Get your helper to add the dry mixture into the wet, slowly to avoid lumps and poofs of flour everywhere.


Lots of helpers in this house.


Pour your mixture into a greased 9*13 baking pan. Bake for 35 minutes or until a knife inserted in the center comes out clean.


Ta Da! Your house will smell incredible. It really captures the smell of pumpkin pie. But here comes the fun part.


Spread a 1/4 to 1/2 bag of mini marshmallows onto the bars. More or less depending on how thick you want the marshmallow topping to be. We went with half.

Enjoy a few (or a handful) of marshmallows. For testing purposes.

Place back into the oven for about 5 minutes, with the setting changed to broil. Keep an eye on it!! Marshmallows can go from roasted to burnt really fast.


Fresh out of the oven. You will be ridiculously tempted to cut into them, but be patient. Allow everything to cool a little, and the marshmallows to firm up.


Look at that! Thick like a slice of pumpkin pie, and that roasted marshmallow top adds a touch of sweetness.


So good you can't eat just one. Go ahead, have another. I wont judge.


These called our name every coffee break or heck every snack break. Make them. I promise you will not regret it.

If you do make them, let us know! Have another pumpkin recipe you love? Share it with us!

Nutrition Information
Serving - 1
Servings per Recipe - 16

Calories  181
Carbs        39
Fat              2
Protien       4
Sodium  104
Sugar       22


Saturday, September 14, 2013

Abigail's 2nd Birthday: Minnie Mouse Luau Party


Happy birthday Abby! Our little girl turned 2!


Abby has so many wonderful interests. Books, cars, coloring, accessorizing. But two of her favorites right now are swimming and Minnie Mouse. In planning for her birthday and thinking of ideas it became apparent there was only one great option: Minnie Mouse Luau and Pool Party!


When guests first arrived they were greeted with a giant Minnie Mouse hanging on the garage.

Making this was incredibly simple. A $5 sheet from Walmart, $3 can of black spray paint, and leftover tulle from her tutu. I traced out the Minnie head in pencil, then sprayed it in with spray paint. After it dried I connected a tulle flower with hot glue. Viola! Instant party announcement.


We spread the Minnie Mouse luau theme throughout our backyard. On our deck I attached green table clothes to the bottom, then sliced it to create a grass skirt appearance. To the rails I attached a fantastic flower garland that I ordered here.


Our garden fence received a colorful face lift with the addition of flower garland and Minnie Mouse heads. We also used the fence posts to display all the flower leis for everyone to pick and choose from.


Our trampoline became a tropical splash pad! We hung palm tree streamers from the posts. To turn this plain trampoline into a splash pad, we ran a garden hose and a little sprinkler under the bottom. Once turned on it splashed and sprayed everyone whenever they would jump.


Even the swing set club house displayed Minnie Mouse fun! I traced and cut a Minnie Mouse head on card board, spray painted it black, and attached a tulle flower. The kids loved pointing out all the Minnie's around the yard.


This has to be one of my favorite additions to the luau. A Minnie Mouse bean bag toss. Trent will expand upon this himself, but it was a fairly straightforward project that was a blast to play with.


To make the bean bags I traced a Minnie outline onto some scrap felt I had then hand stitched them closed. Too lazy (and busy) to drag out the sewing machine.


The happy birthday girl!We set up a bubble machine on the deck rail, and Abby was more than happy to run through the sea of bubbles covering the yard.


For birthday photos I picked up these coconut containers from our local Dollar Tree. They were cute on their own, but needed to be more festive. I traced Minnie Mouse ears onto card stock then cut and hot glued them onto the lids. The flowers came with the containers, but after designing the Thank You tags I attached them onto the flower stem.

Inside was a Minnie Mouse cookie and Minnie Mouse stickers.


Favors for kids and adults alike. Paper fans (it was hot!) and tropical clackers.

Gabe thinks they are magic wands. Works for me (a lot less noisy) ;)


Everyone spent a huge amount of time at this table. Sugar cookies to decorate with pink frosting and sprinkles, vegetable tray, fruit skewers, and goldfish. We also had large metal tubs filled with waters, sodas, and juice boxes.


We wanted to do something special for the meal that allowed our guests to be involved. Grilled flatbread pizzas!


The guests filled out a menu card then Trent and I would grill them up to order. Quick, fresh, and everyone was able to enjoy their perfect pizza.


A delicious flatbread fresh off the grill.


Then there was cake. Delicious cake.


Banana cake, vanilla custard filling, and lemon meringue frosting. Tropical but light. And most importantly, Abby loved it!


Side note: Abigail received this pink cozy coupe that day. She refused to leave it, even for cake. Trent had to pull the table up next to the car so she could enjoy her cake without leaving it. Silly girl.


And the happy girl, along with our wonderful family and friends all enjoyed a long dip in the pool on a hot day. Abigail, our little fish, could not have been happier.


A fantastic Minnie Mouse Luau to celebrate two years with this silly, loving, smart, precious little girl.


Happy birthday Abby! We love you!